
728x90
Radio Button과 달리 Check Box는 다중 선택 지원 가능
코드
activity_main.xml
<?xml version="1.0" encoding="utf-8"?>
<androidx.constraintlayout.widget.ConstraintLayout xmlns:android="http://schemas.android.com/apk/res/android"
    xmlns:app="http://schemas.android.com/apk/res-auto"
    xmlns:tools="http://schemas.android.com/tools"
    android:layout_width="match_parent"
    android:layout_height="match_parent"
    tools:context=".MainActivity">

    <TextView
        android:id="@+id/tv_result"
        android:layout_width="wrap_content"
        android:layout_height="wrap_content"
        android:layout_marginTop="32dp"
        android:text="결과 텍스트"
        android:textSize="34sp"
        app:layout_constraintEnd_toEndOf="parent"
        app:layout_constraintStart_toStartOf="parent"
        app:layout_constraintTop_toBottomOf="@+id/btn_result" />

    <CheckBox
        android:id="@+id/chk_red"
        android:layout_width="wrap_content"
        android:layout_height="wrap_content"
        android:layout_marginTop="80dp"
        android:text="빨강"
        app:layout_constraintEnd_toEndOf="parent"
        app:layout_constraintStart_toStartOf="parent"
        app:layout_constraintTop_toTopOf="parent" />

    <CheckBox
        android:id="@+id/chk_blue"
        android:layout_width="wrap_content"
        android:layout_height="wrap_content"
        android:text="파랑"
        app:layout_constraintEnd_toEndOf="parent"
        app:layout_constraintStart_toStartOf="parent"
        app:layout_constraintTop_toBottomOf="@+id/chk_red" />

    <CheckBox
        android:id="@+id/chk_green"
        android:layout_width="wrap_content"
        android:layout_height="wrap_content"
        android:text="초록"
        app:layout_constraintEnd_toEndOf="parent"
        app:layout_constraintStart_toStartOf="parent"
        app:layout_constraintTop_toBottomOf="@+id/chk_blue" />

    <Button
        android:id="@+id/btn_result"
        android:layout_width="wrap_content"
        android:layout_height="wrap_content"
        android:layout_marginTop="36dp"
        android:text="선택 완료"
        app:layout_constraintEnd_toEndOf="parent"
        app:layout_constraintHorizontal_bias="0.498"
        app:layout_constraintStart_toStartOf="parent"
        app:layout_constraintTop_toBottomOf="@+id/chk_green" />

</androidx.constraintlayout.widget.ConstraintLayout>
MainActivity.java
package com.example.checkboxexample;

import androidx.appcompat.app.AppCompatActivity;

import android.annotation.SuppressLint;
import android.os.Bundle;
import android.view.View;
import android.widget.Button;
import android.widget.CheckBox;
import android.widget.TextView;

public class MainActivity extends AppCompatActivity {

    private CheckBox chk_red, chk_blue, chk_green;
    private TextView tv_result;
    private Button btn_result;

    @SuppressLint("MissingInflatedId")
    @Override
    protected void onCreate(Bundle savedInstanceState) {
        super.onCreate(savedInstanceState);
        setContentView(R.layout.activity_main);

        chk_red=findViewById(R.id.chk_red);
        chk_blue=findViewById(R.id.chk_blue);
        chk_green=findViewById(R.id.chk_green);
        tv_result=findViewById(R.id.tv_result);
        btn_result=findViewById(R.id.btn_result);

        btn_result.setOnClickListener(new View.OnClickListener() { // 결과 버튼을 클릭했을 때 액션
            @Override
            public void onClick(View v) {
                String str_result=""; // String 값 초기화
                if(chk_red.isChecked()){ // 빨강 체크 박스에 체크가 되어있다면...
                    str_result += chk_red.getText().toString();
                }
                if(chk_blue.isChecked()){ // 파랑 체크 박스에 체크가 되어있다면...
                    str_result += chk_blue.getText().toString();
                }
                if(chk_green.isChecked()){// 초록 체크 박스에 체크가 되어있다면...
                    str_result += chk_green.getText().toString();
                }

                tv_result.setText(str_result); // 체크박스에 체크되어있던 값을 String으로 텍스트뷰에 출력
            }
        });


    }
}String str_result가 저 위치에서 공백으로 초기화되어야 문제가 생기지 않는다. (값이 덮어써지는 등의)
결과
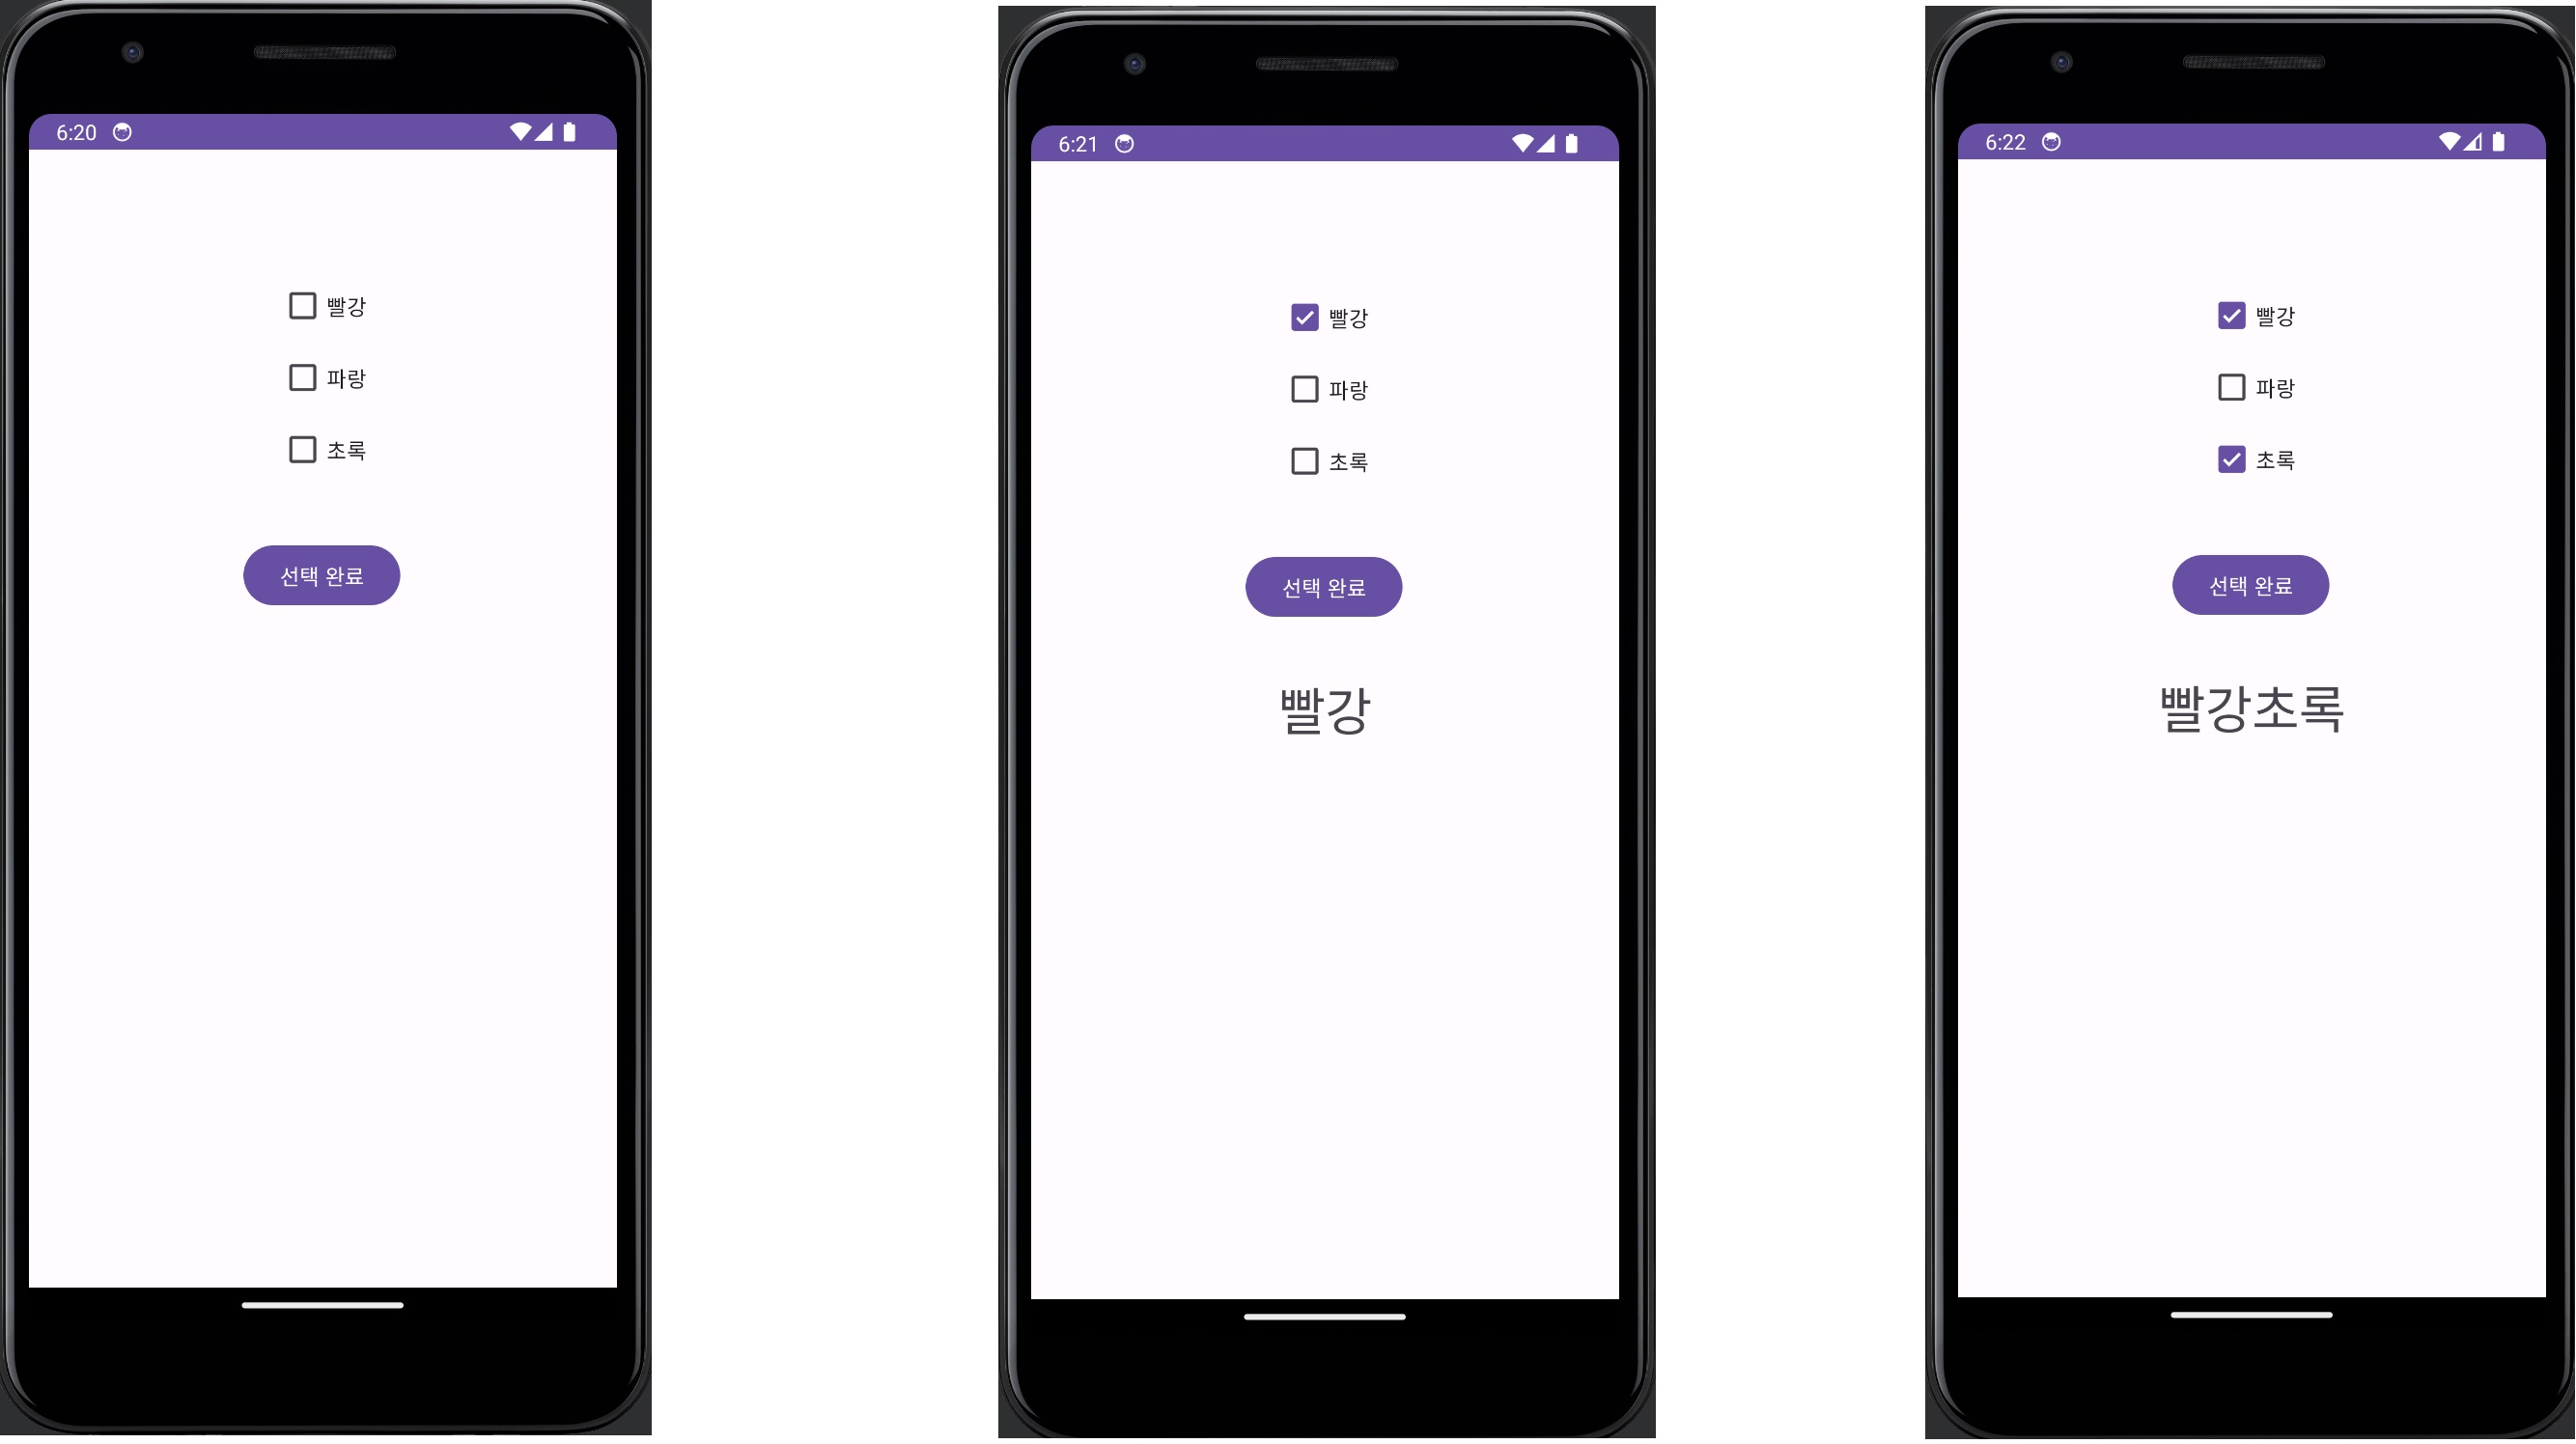
체크박스 값 저장하던지
다음 액티비티로 intent putExtra 해서 넘긴다든지 등에 활용할 수 있다.
728x90
'[Android Studio] (Java)' 카테고리의 다른 글
| [Android Studio] Table Layout (엑셀 표 느낌) (0) | 2023.09.02 |
|---|---|
| [Android Studio] Card View (카드 뷰) (0) | 2023.09.02 |
| [Android Studio] Radio Button (옵션 선택 버튼) (0) | 2023.09.02 |
| [Android Studio] ConstraintLayout (0) | 2023.09.01 |
| [Android Studio] 네트워크 상태 체크 (broadcastReciver) (0) | 2023.09.01 |