
728x90
build.gradle.kts(Module :app) 에서
implementation("androidx.recyclerview:recyclerview:1.0.0")implementation("com.github.bumptech.glide:glide:4.10.0")이미지 로딩을 원활하게 해주는 라이브러리 (피카소라는 라이브러리랑 범용적으로 쓰임)
annotationProcessor("com.github.bumptech.glide:compiler:4.10.0")이것도 같이 넣어야 대응됨
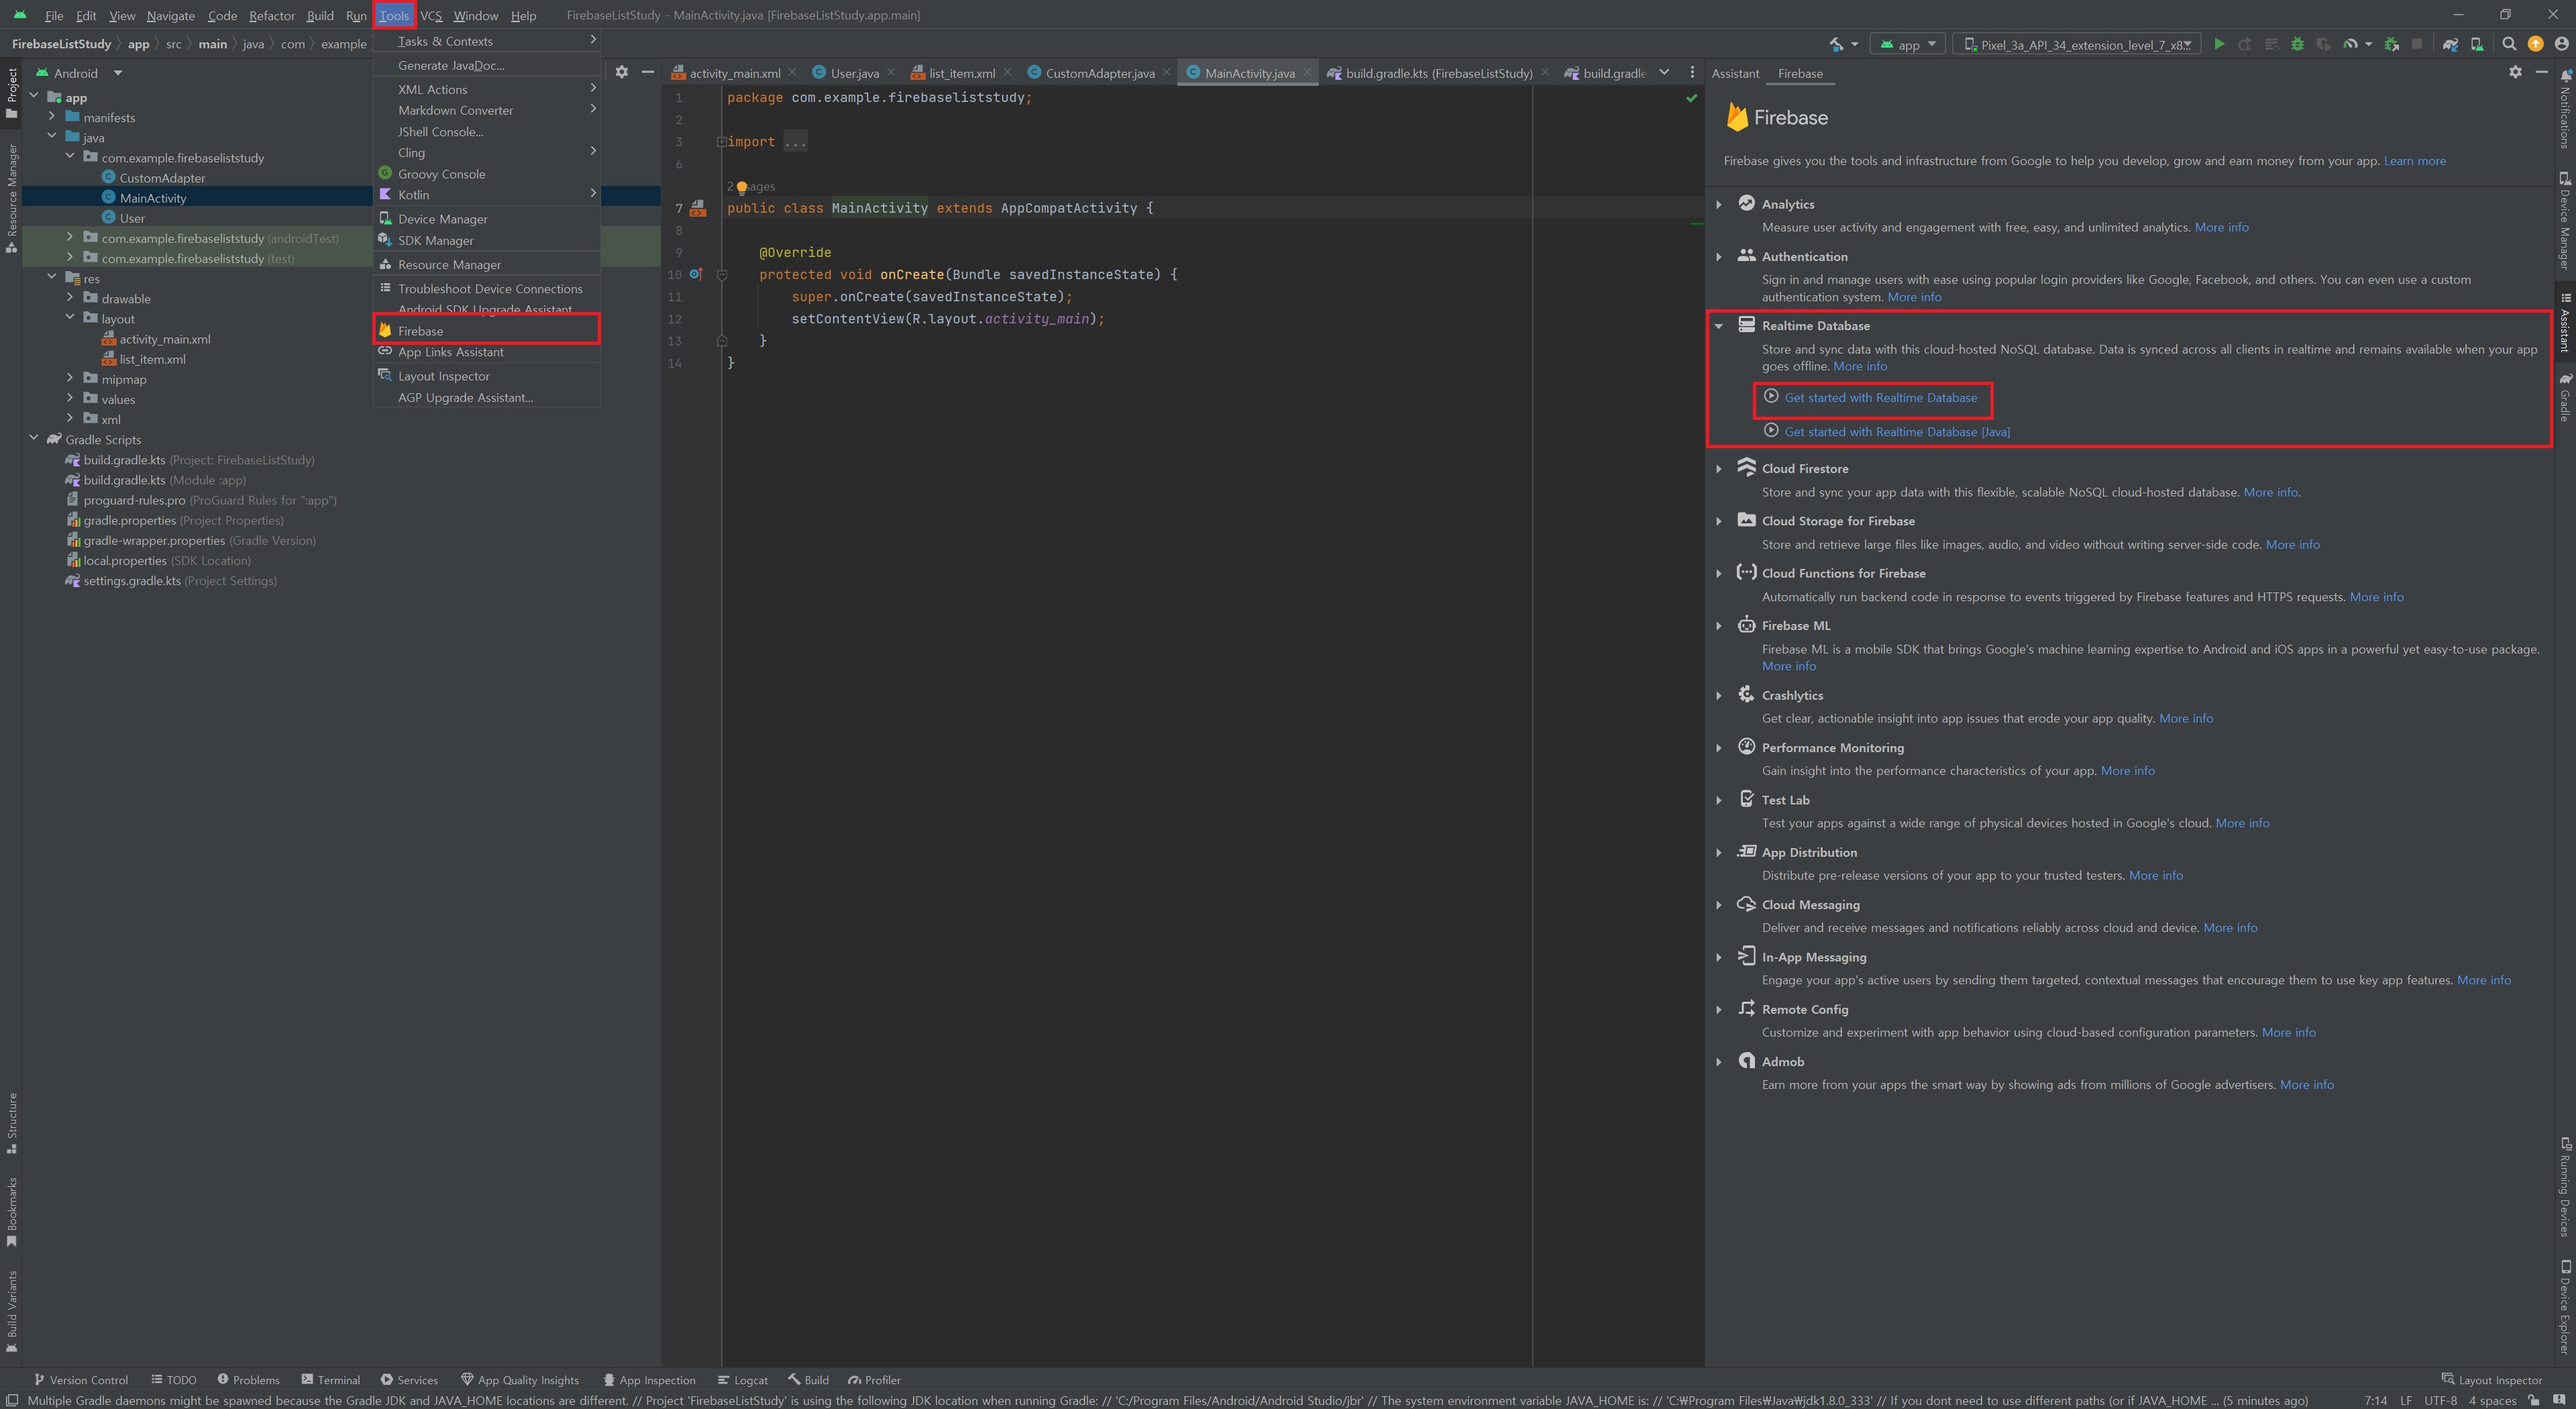
빨간색 모두 클릭
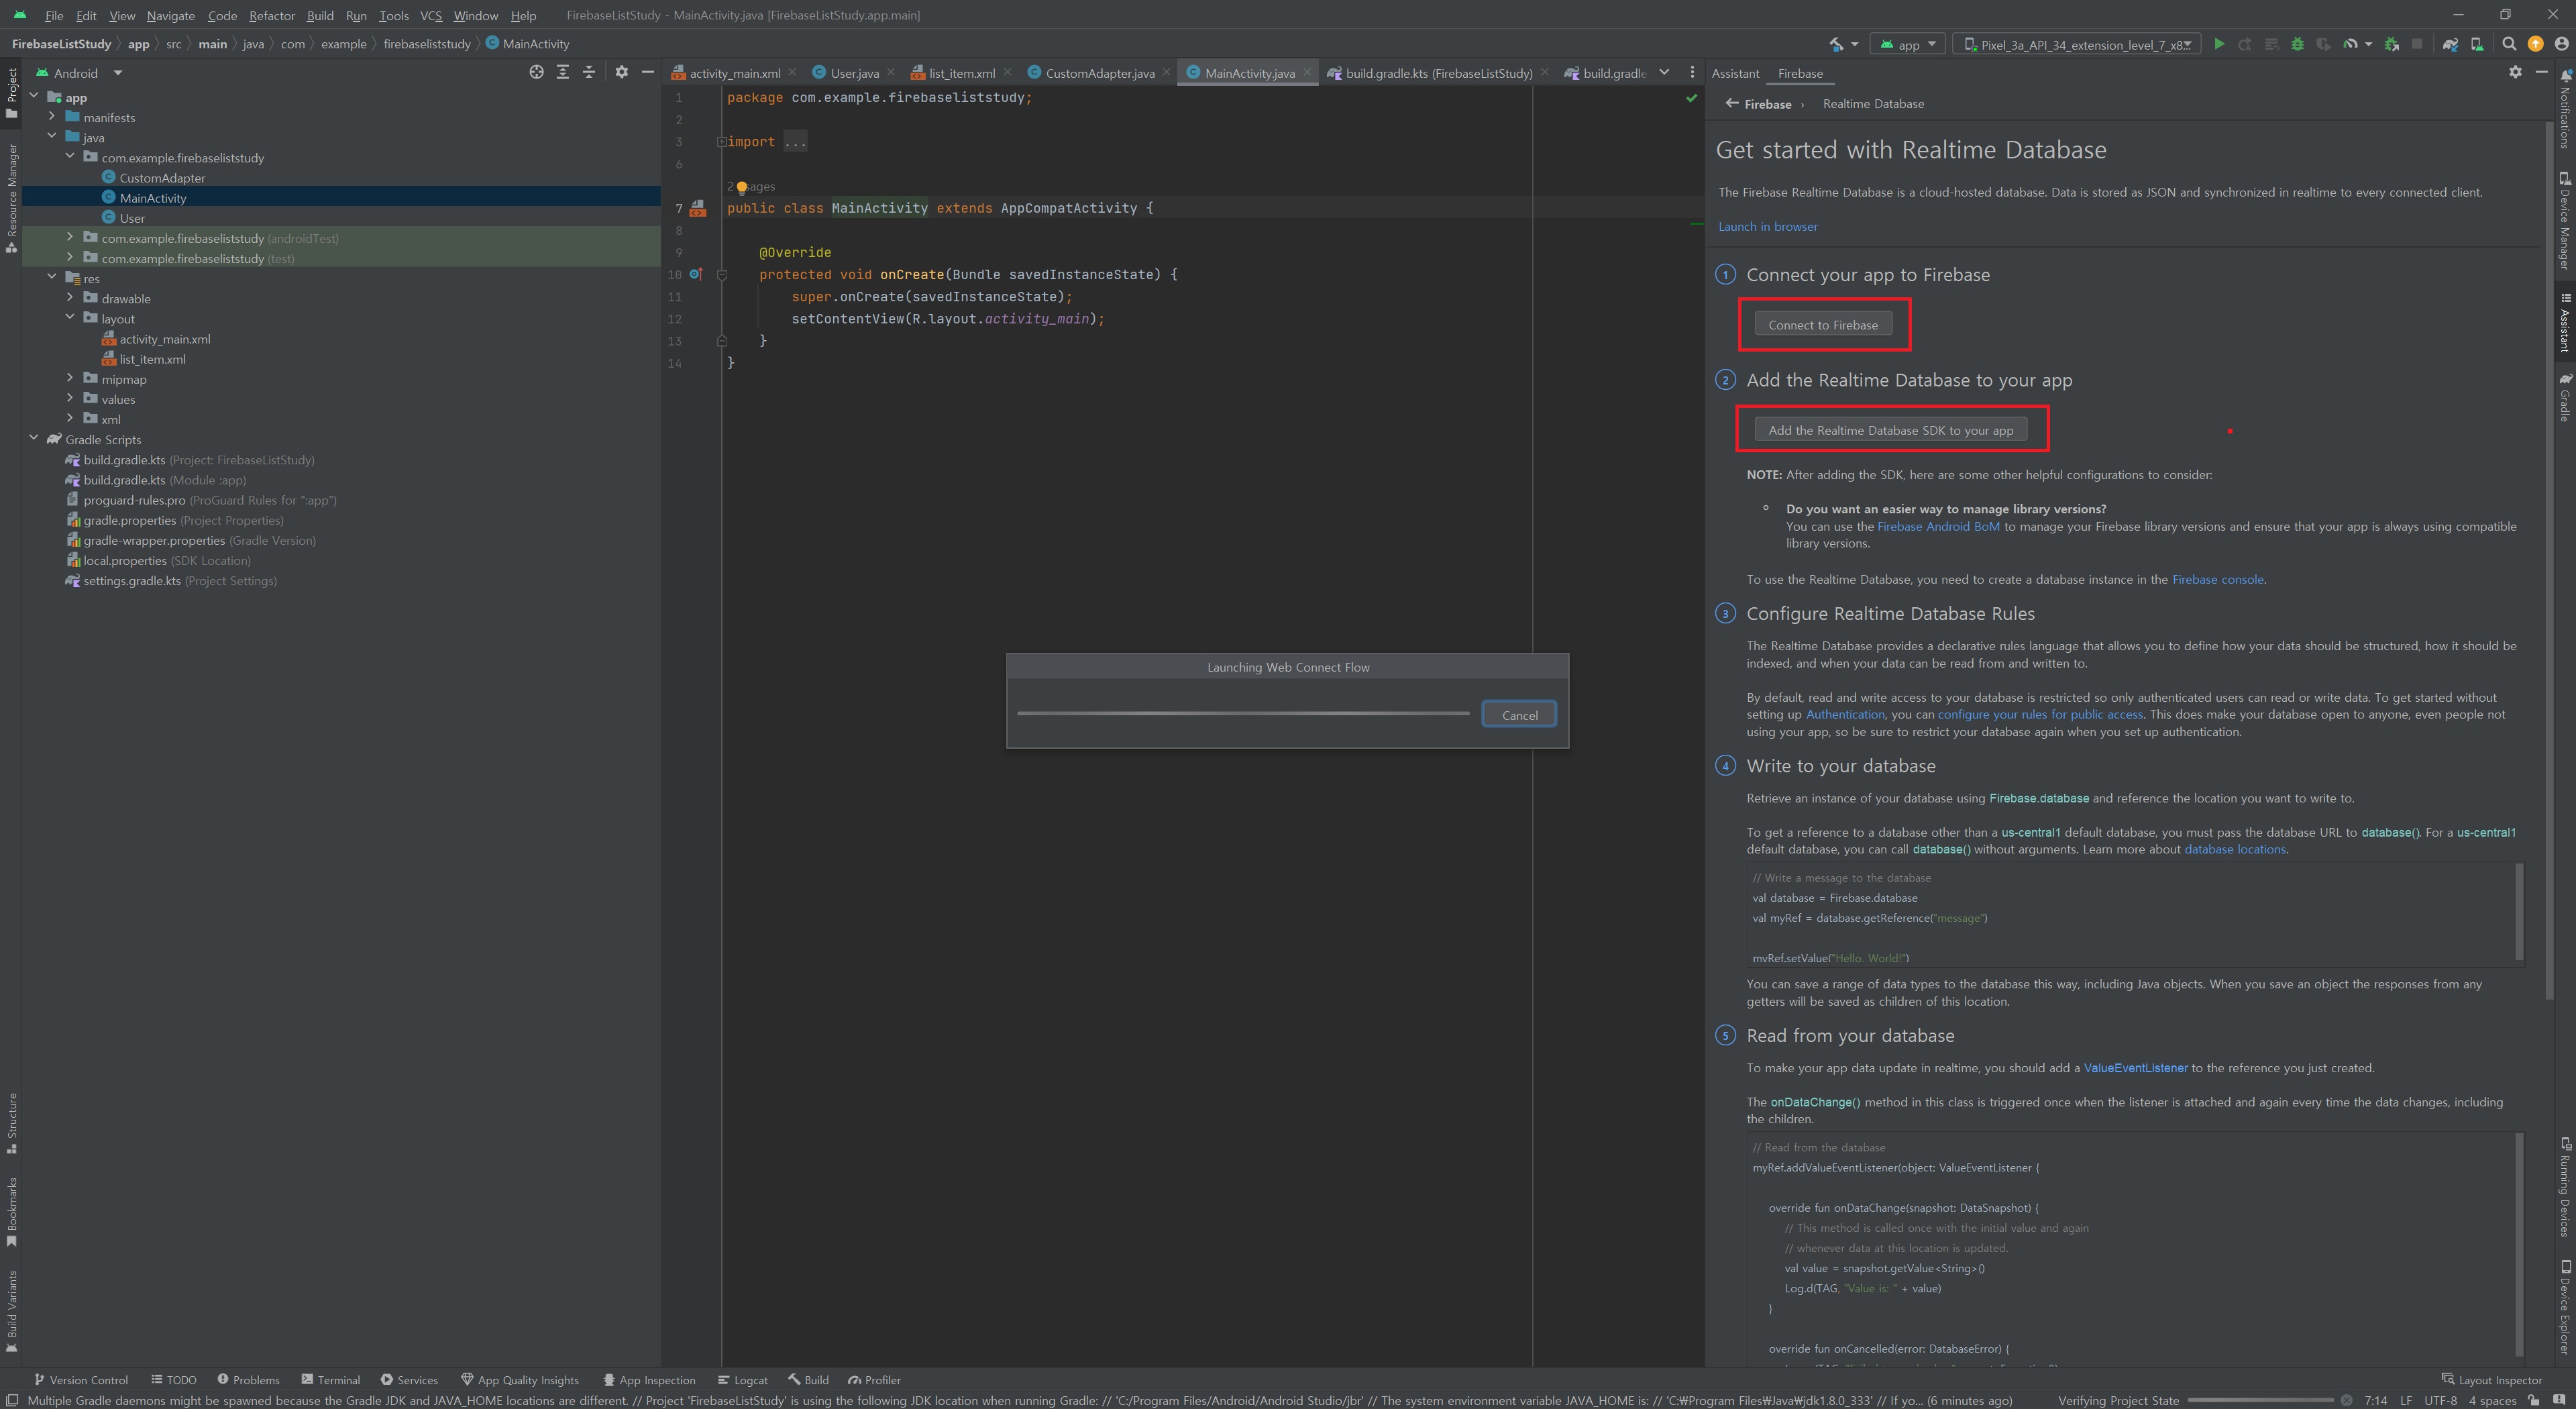
Main으로 돌아와서 어댑터랑 액티비티 연결(코드)
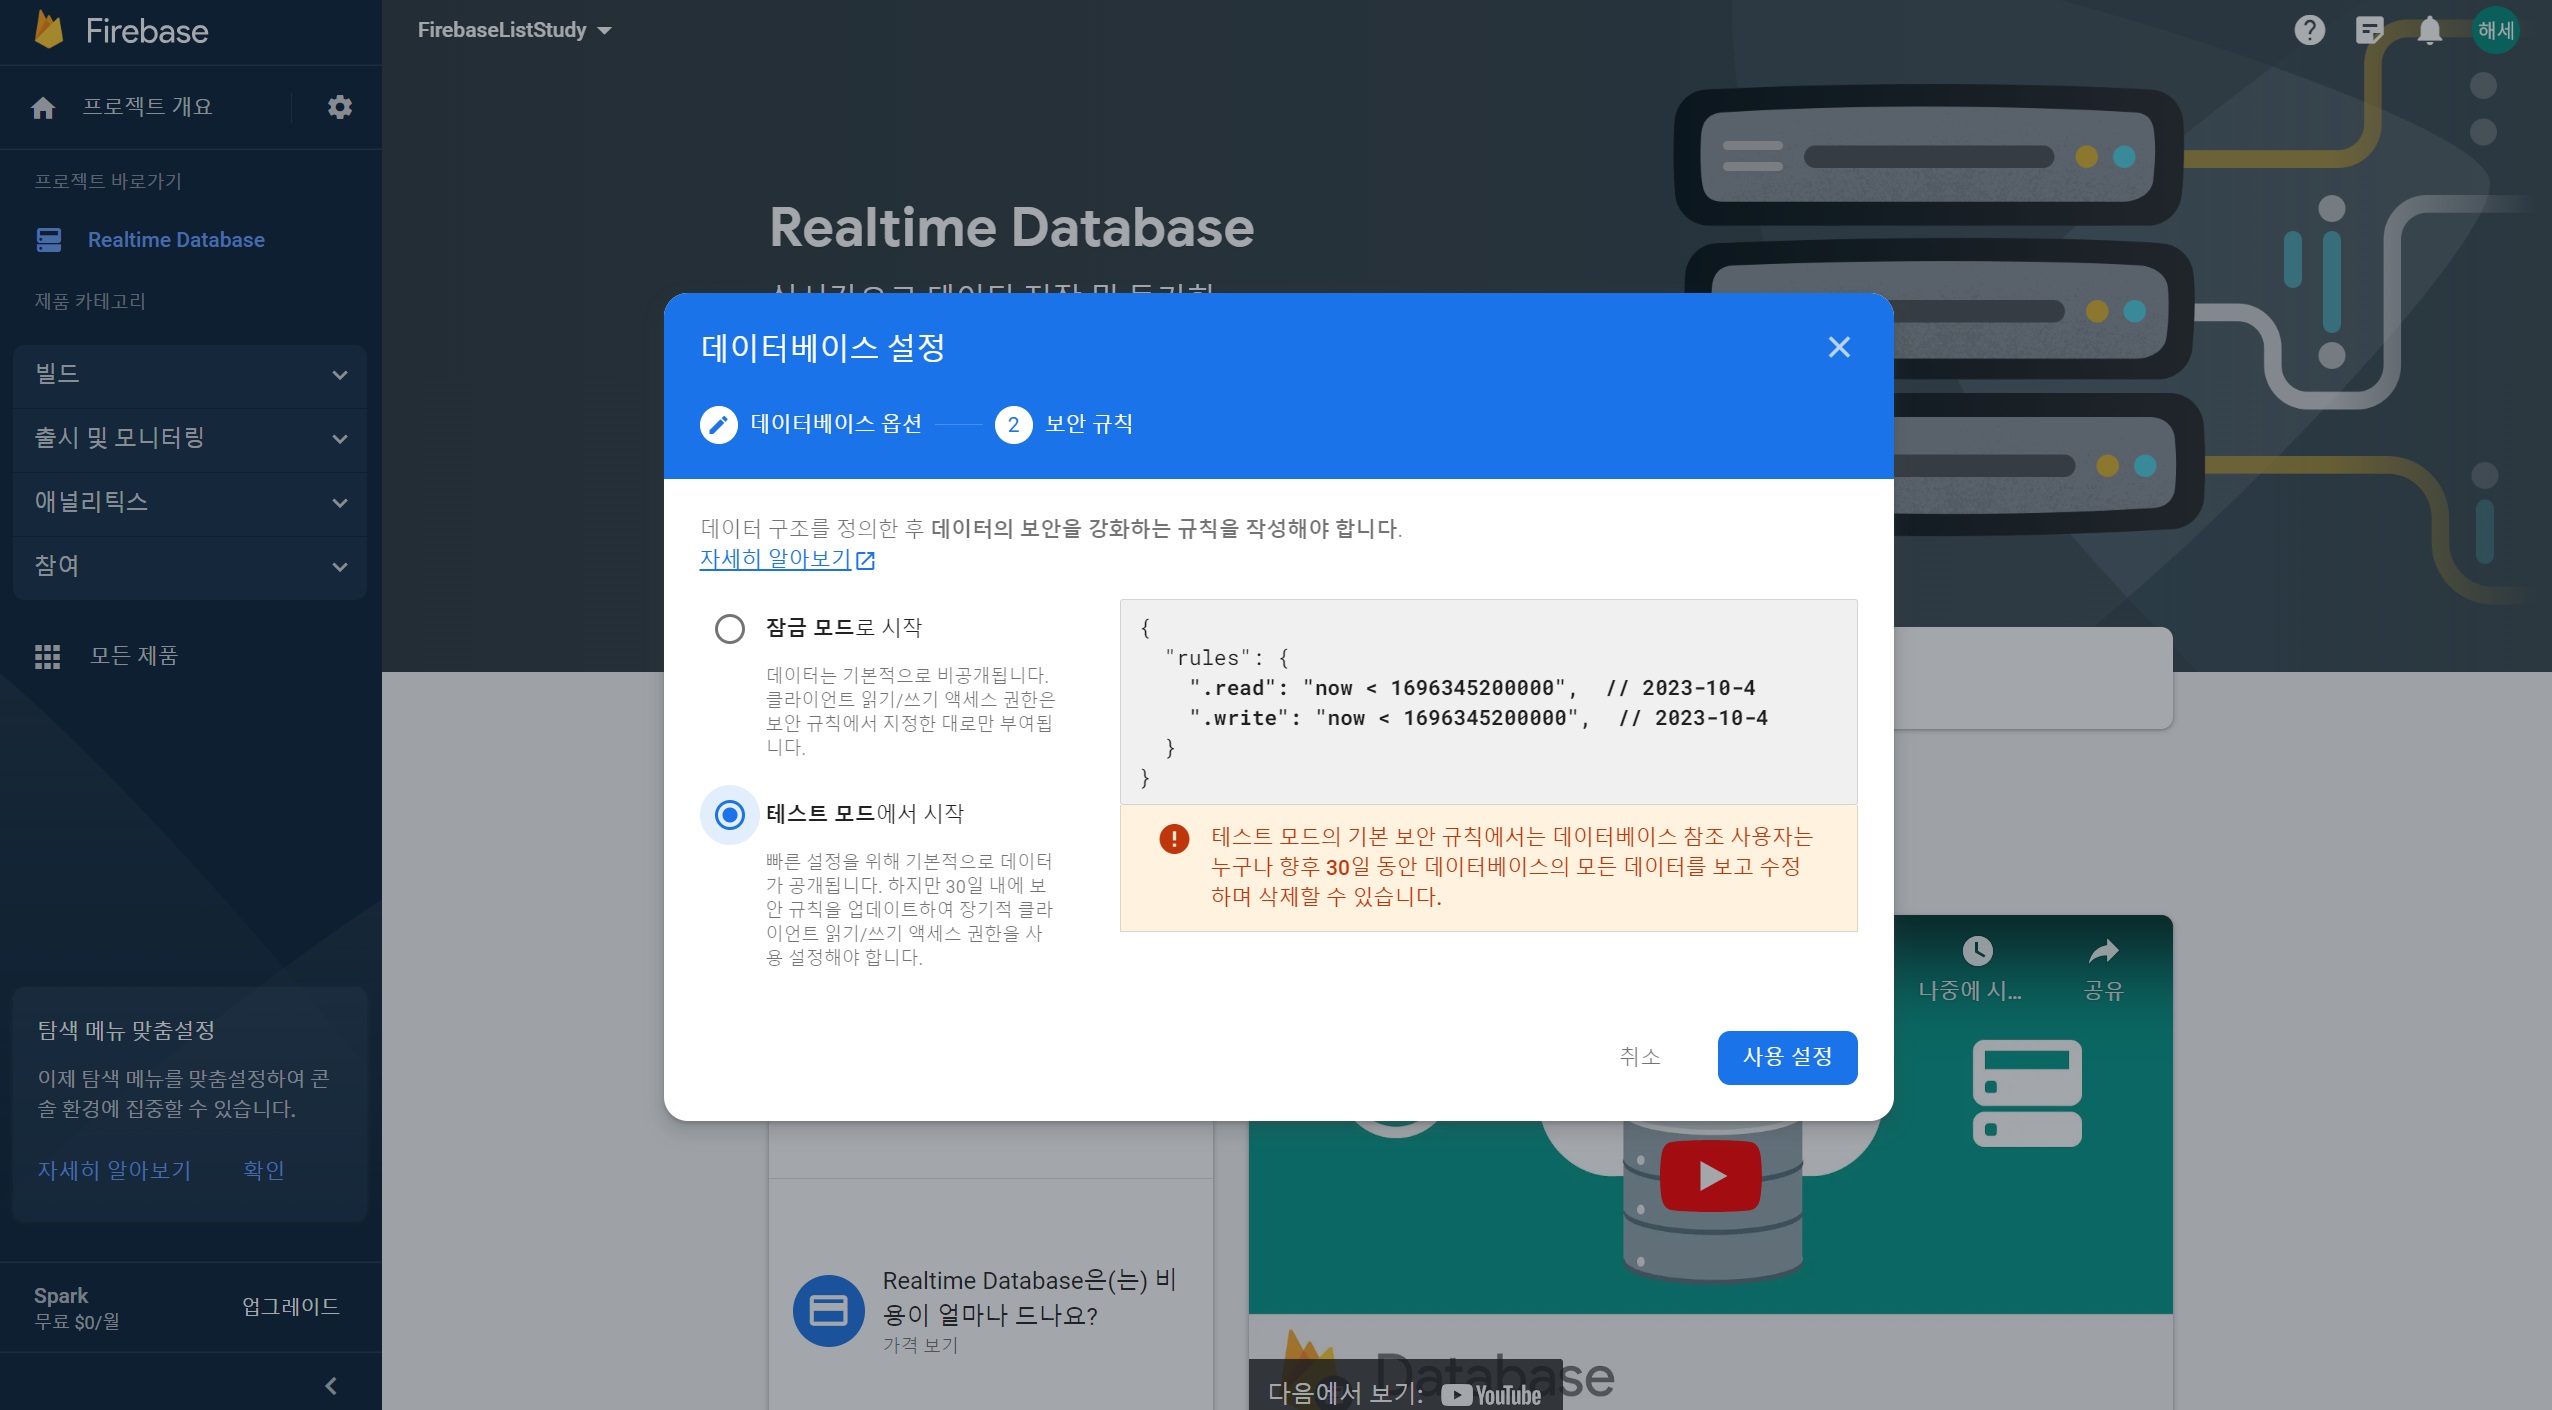
테스트 모드에서 시작 클릭
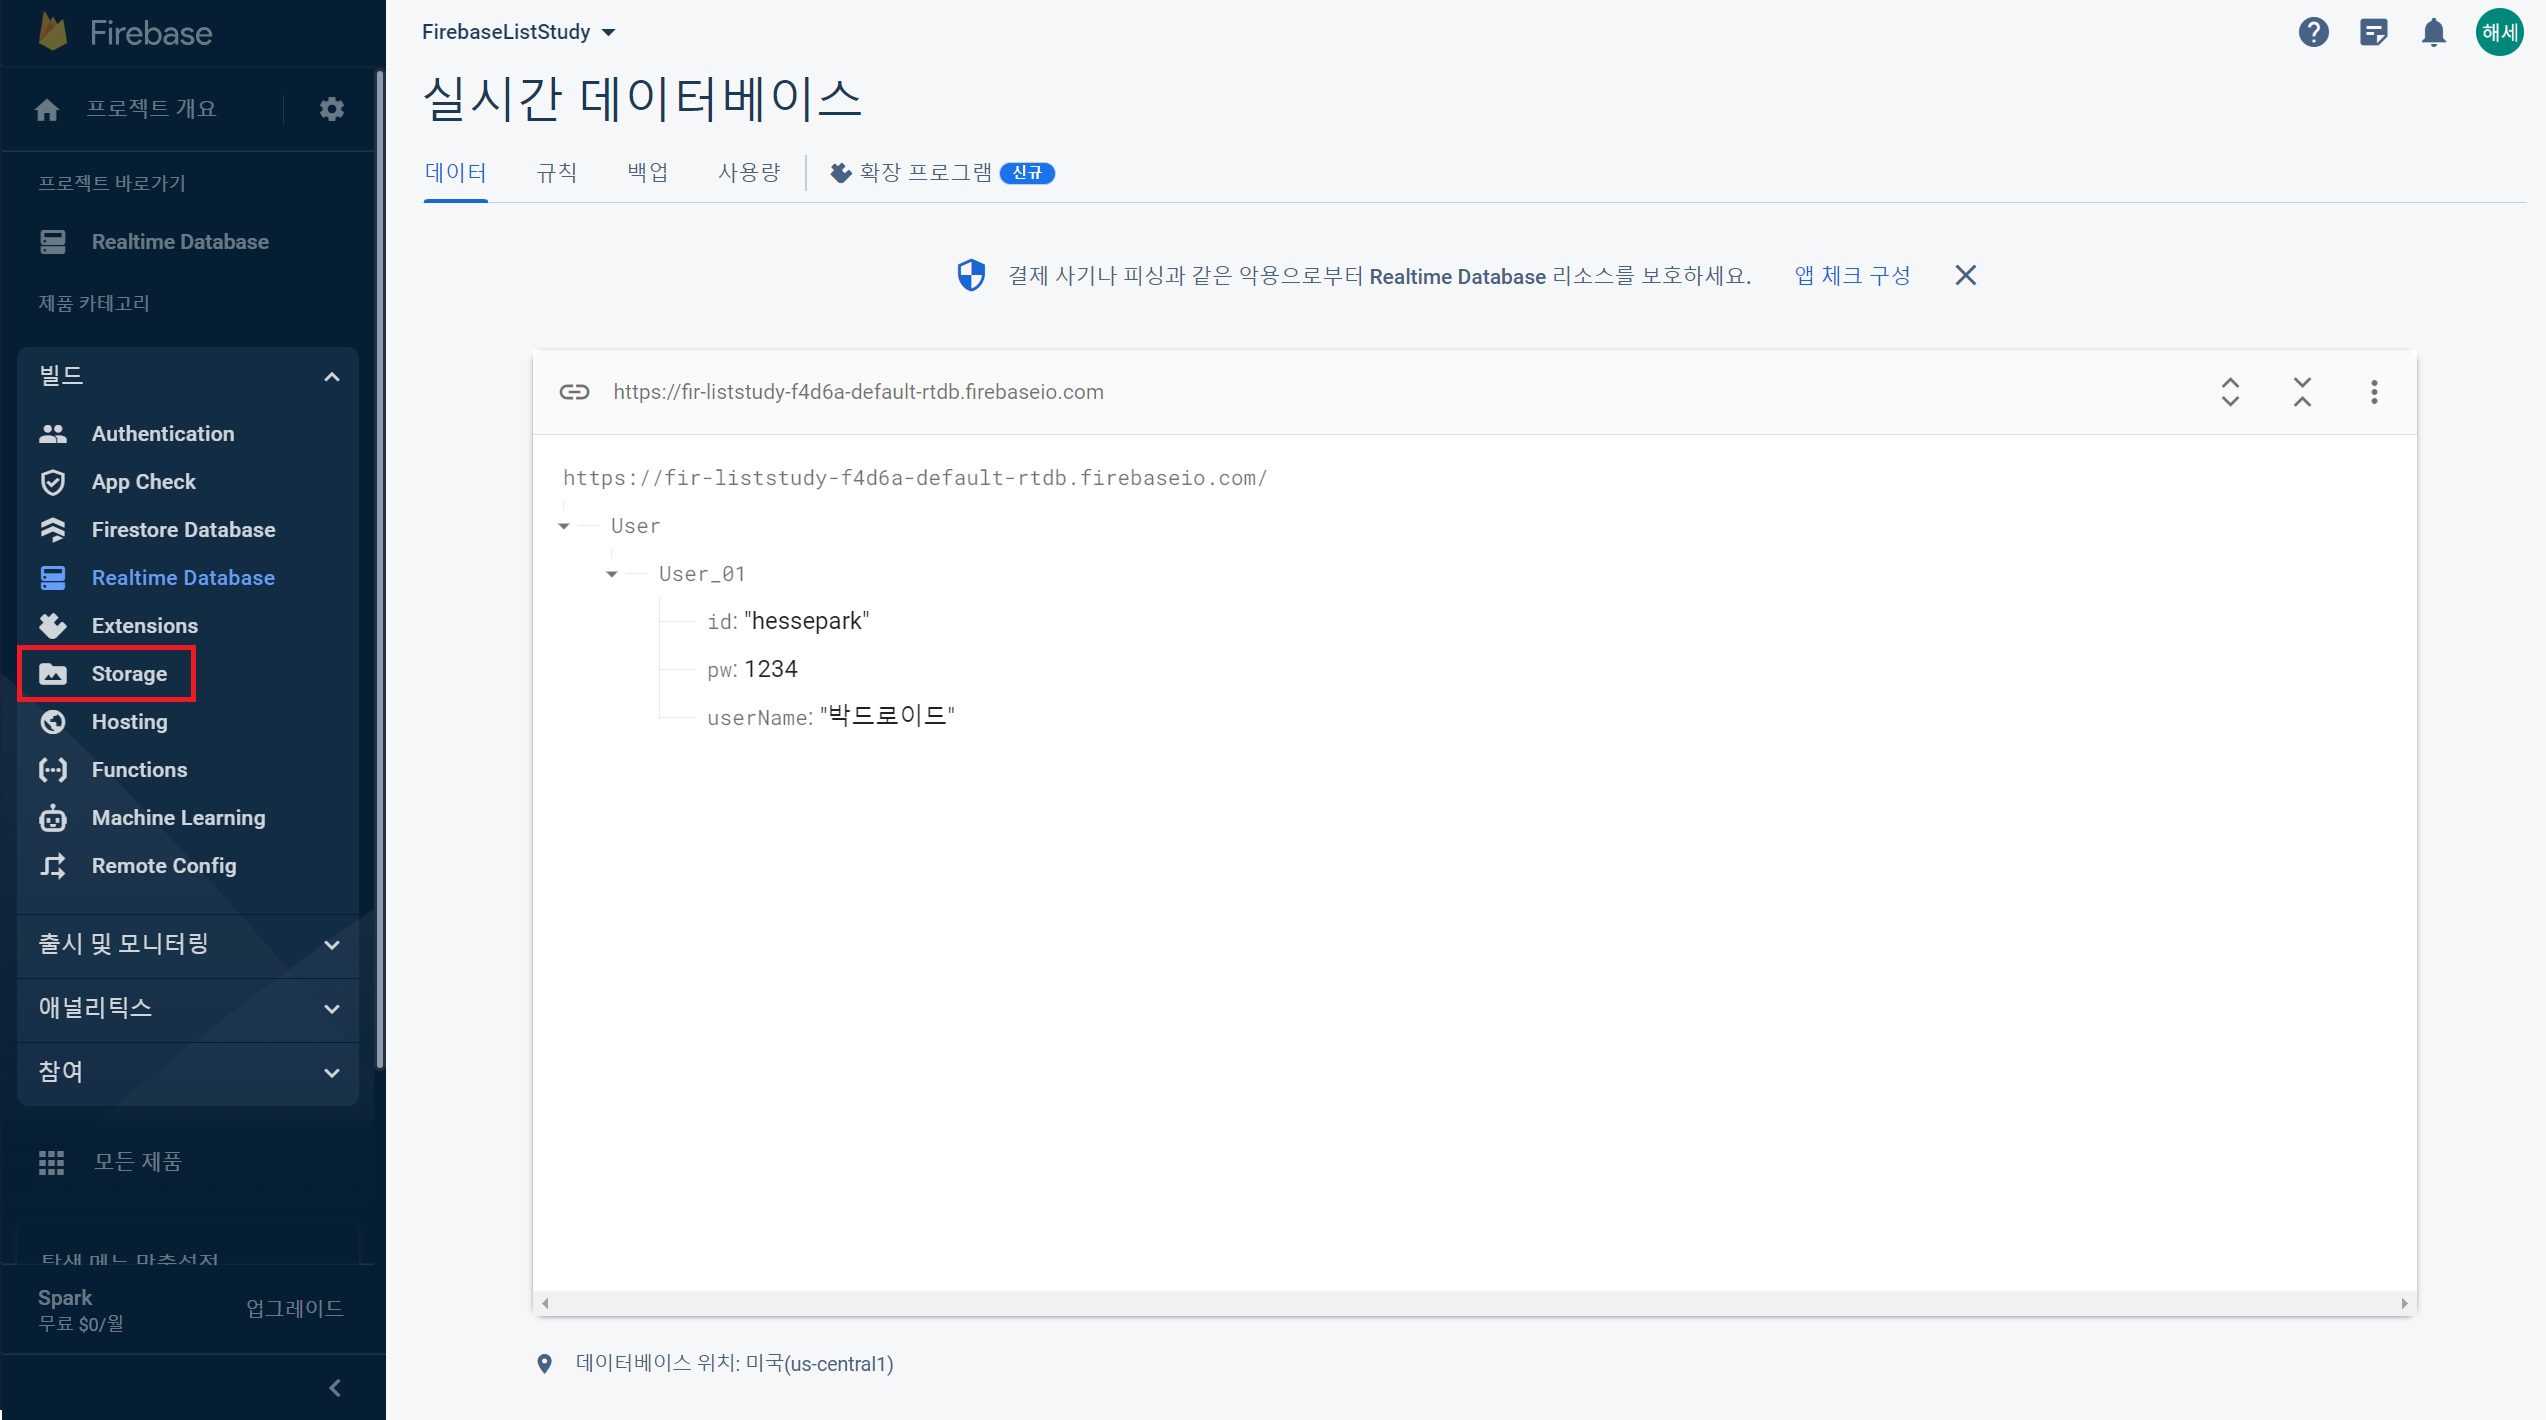
Image 넣기 위해 Stoarge 활성화
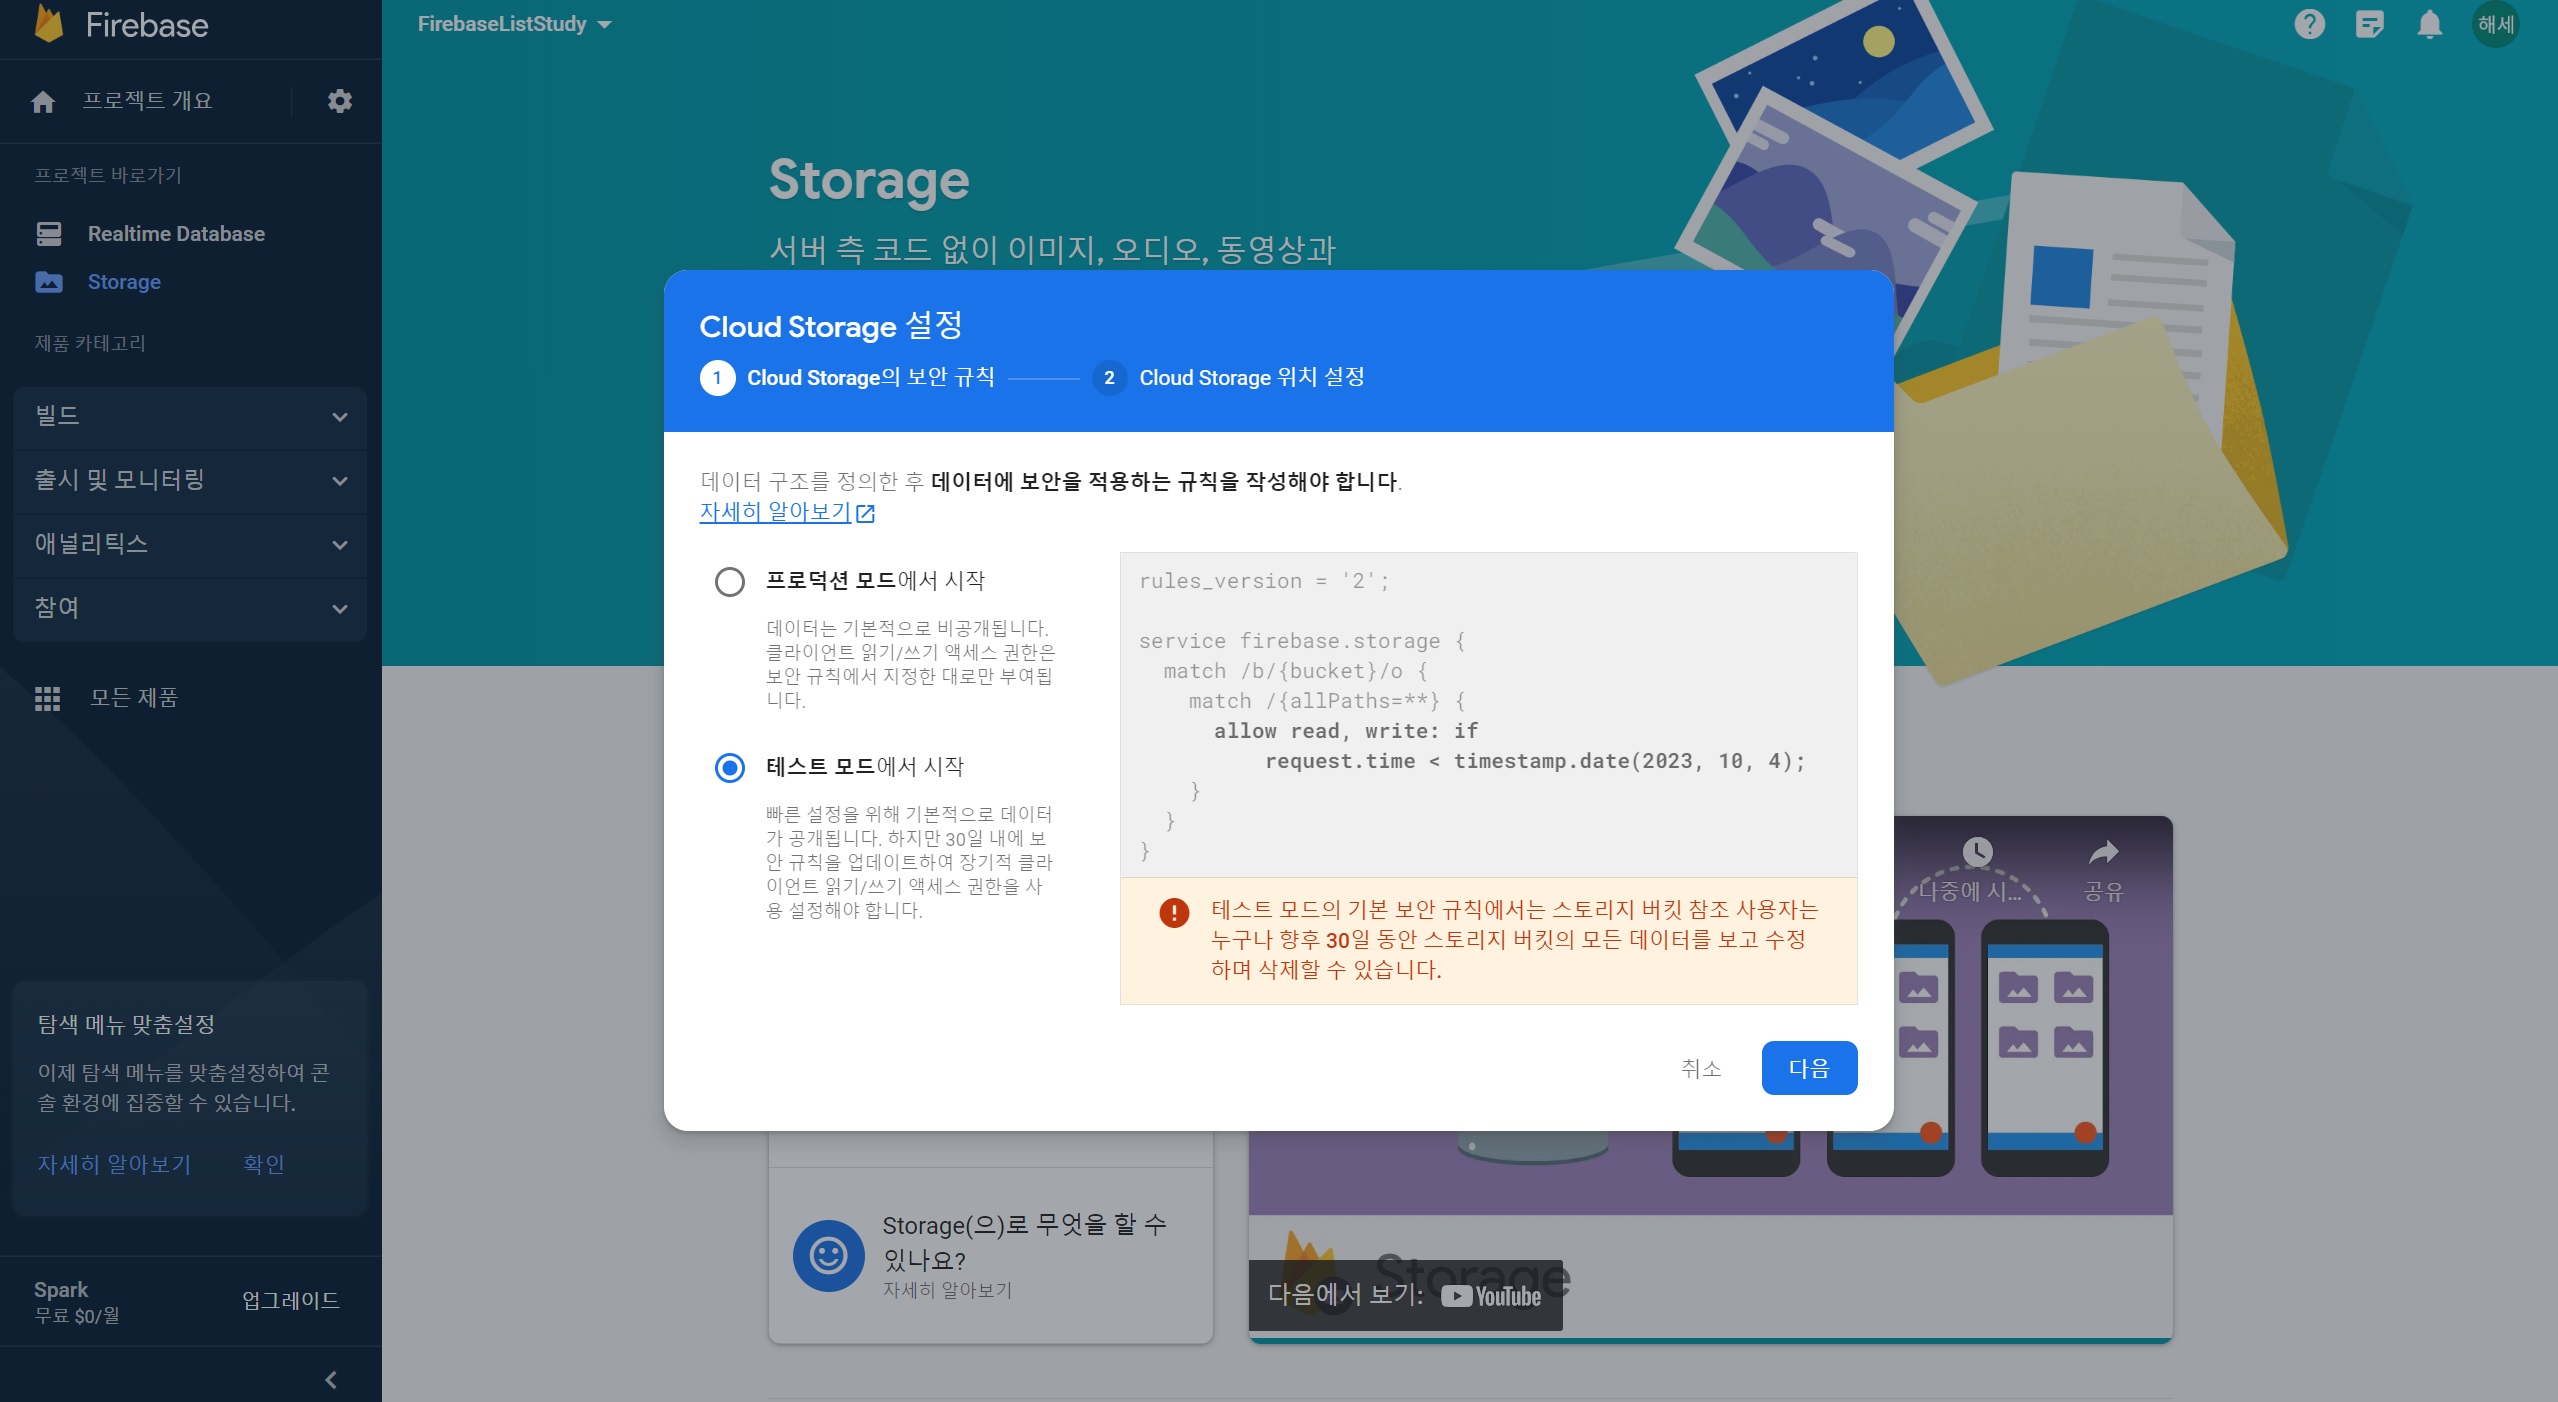
테스트 모드에서 시작 클릭
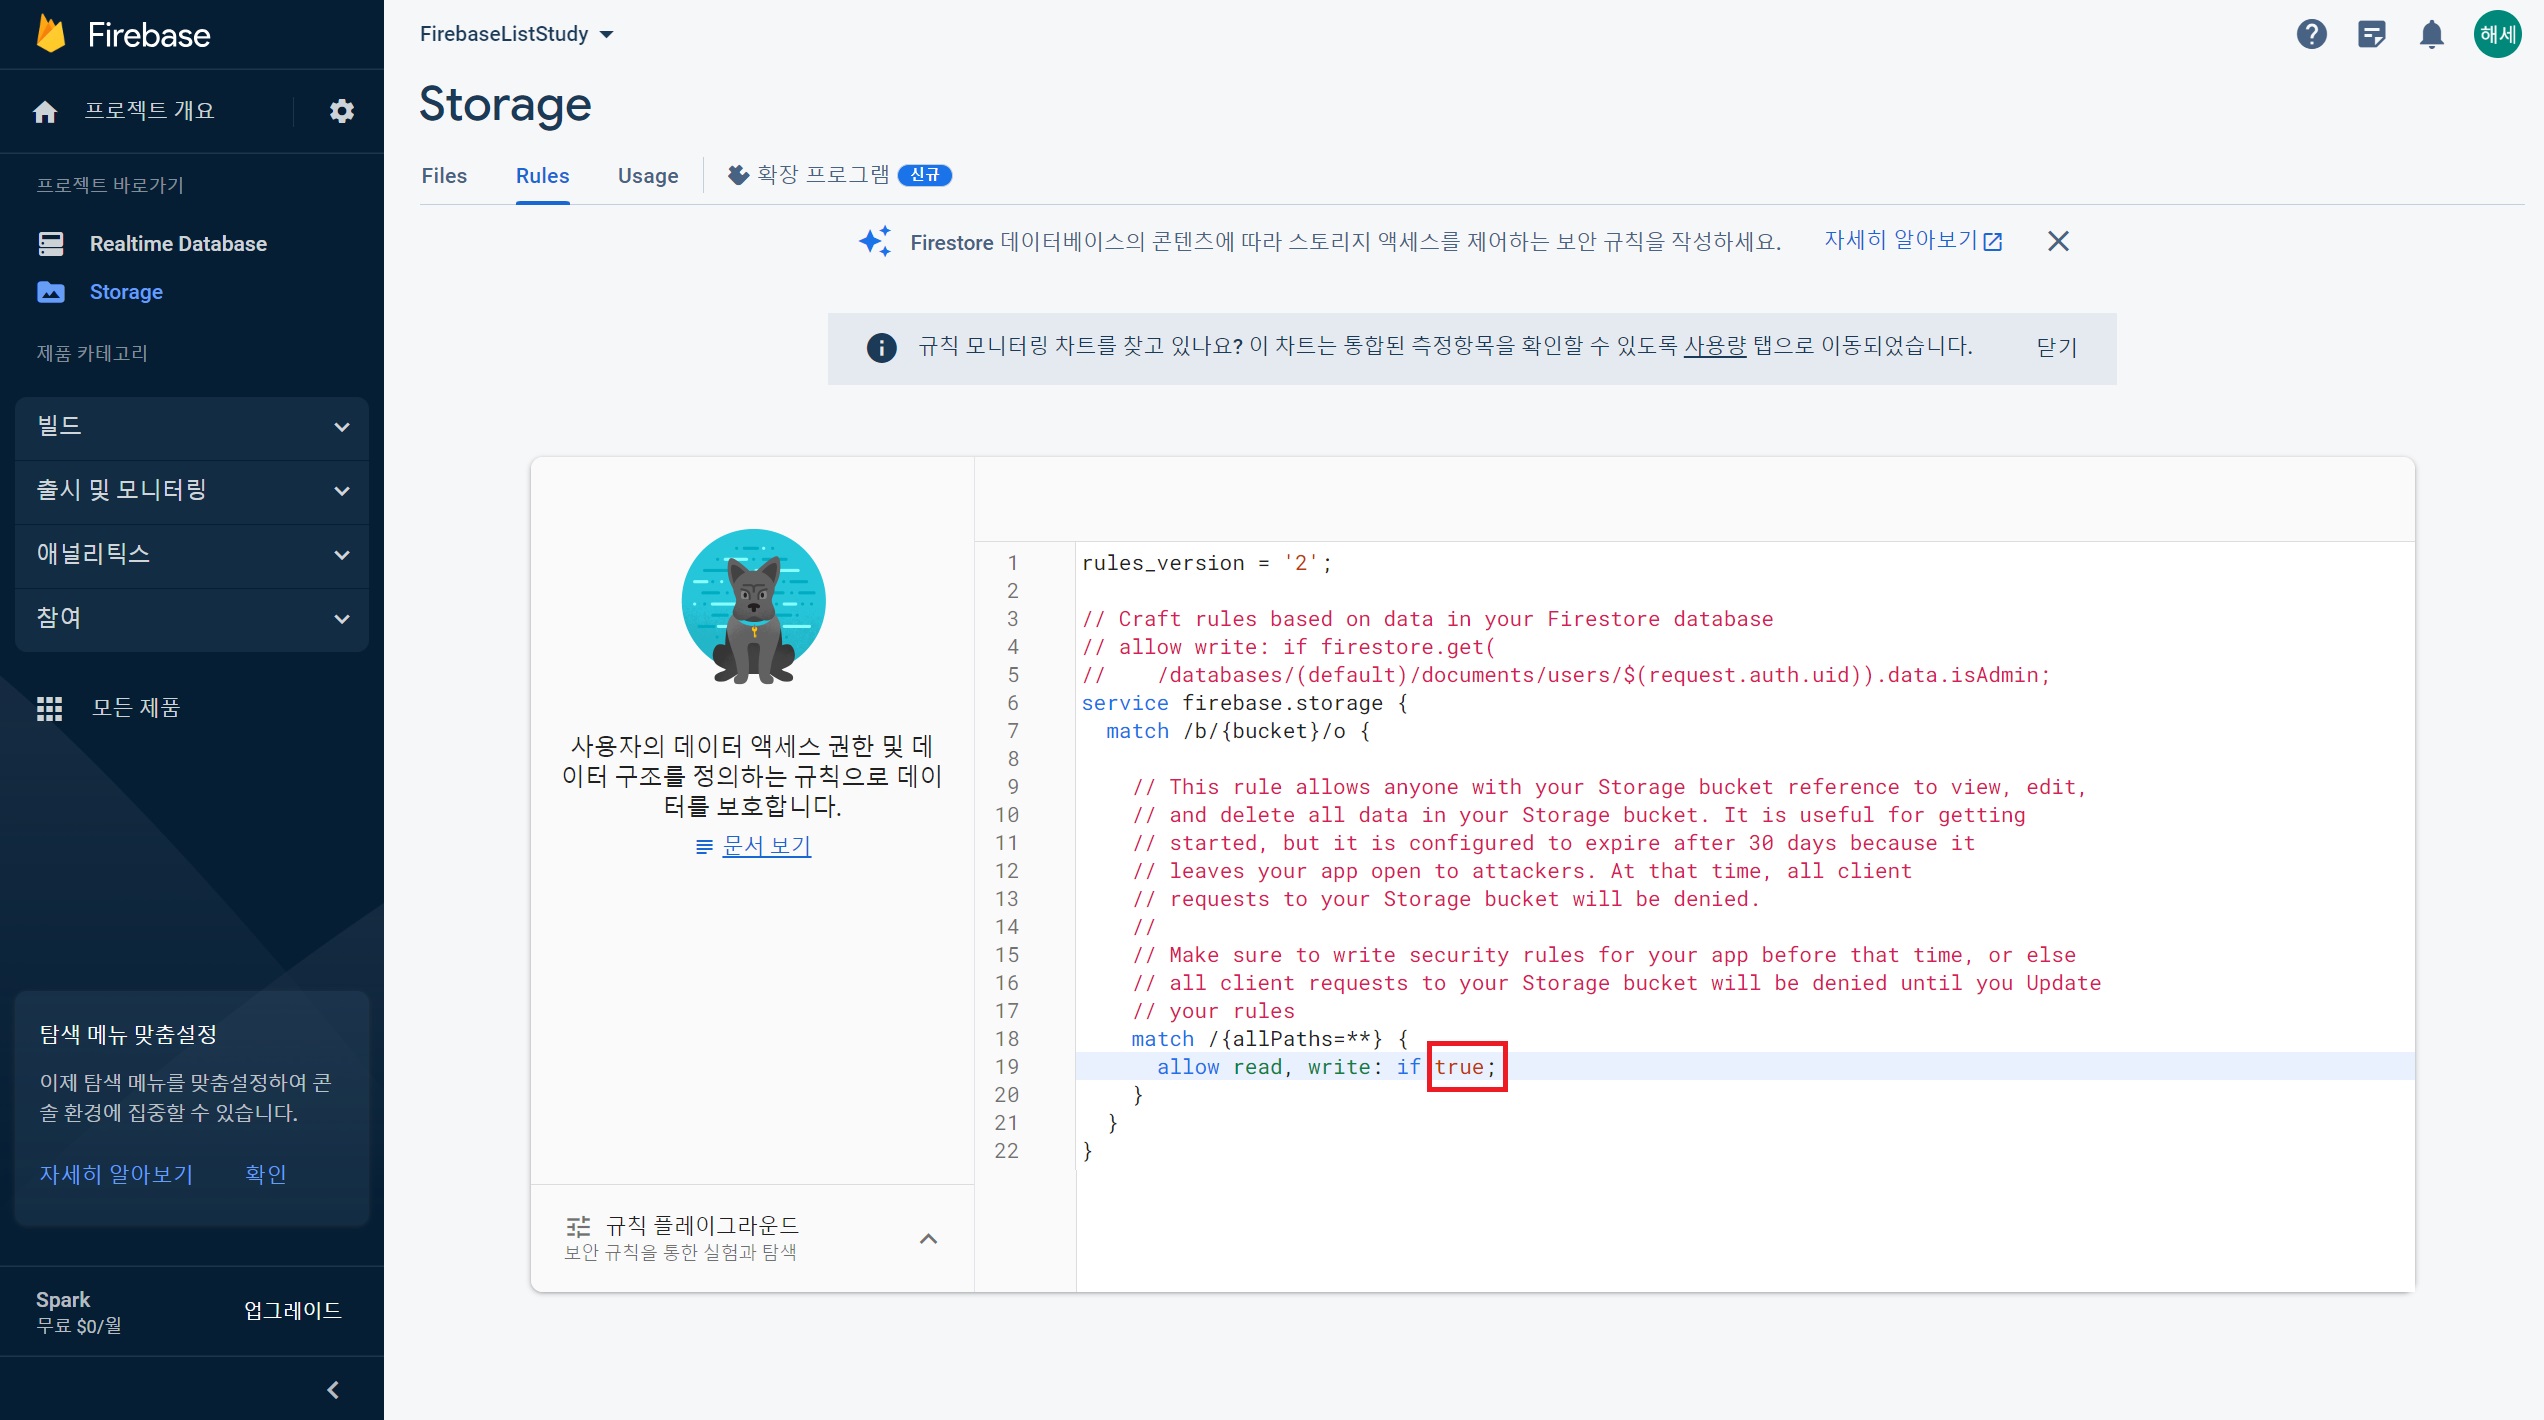
규칙 수정
Stoarge 접근 권한을 뚫어준다.
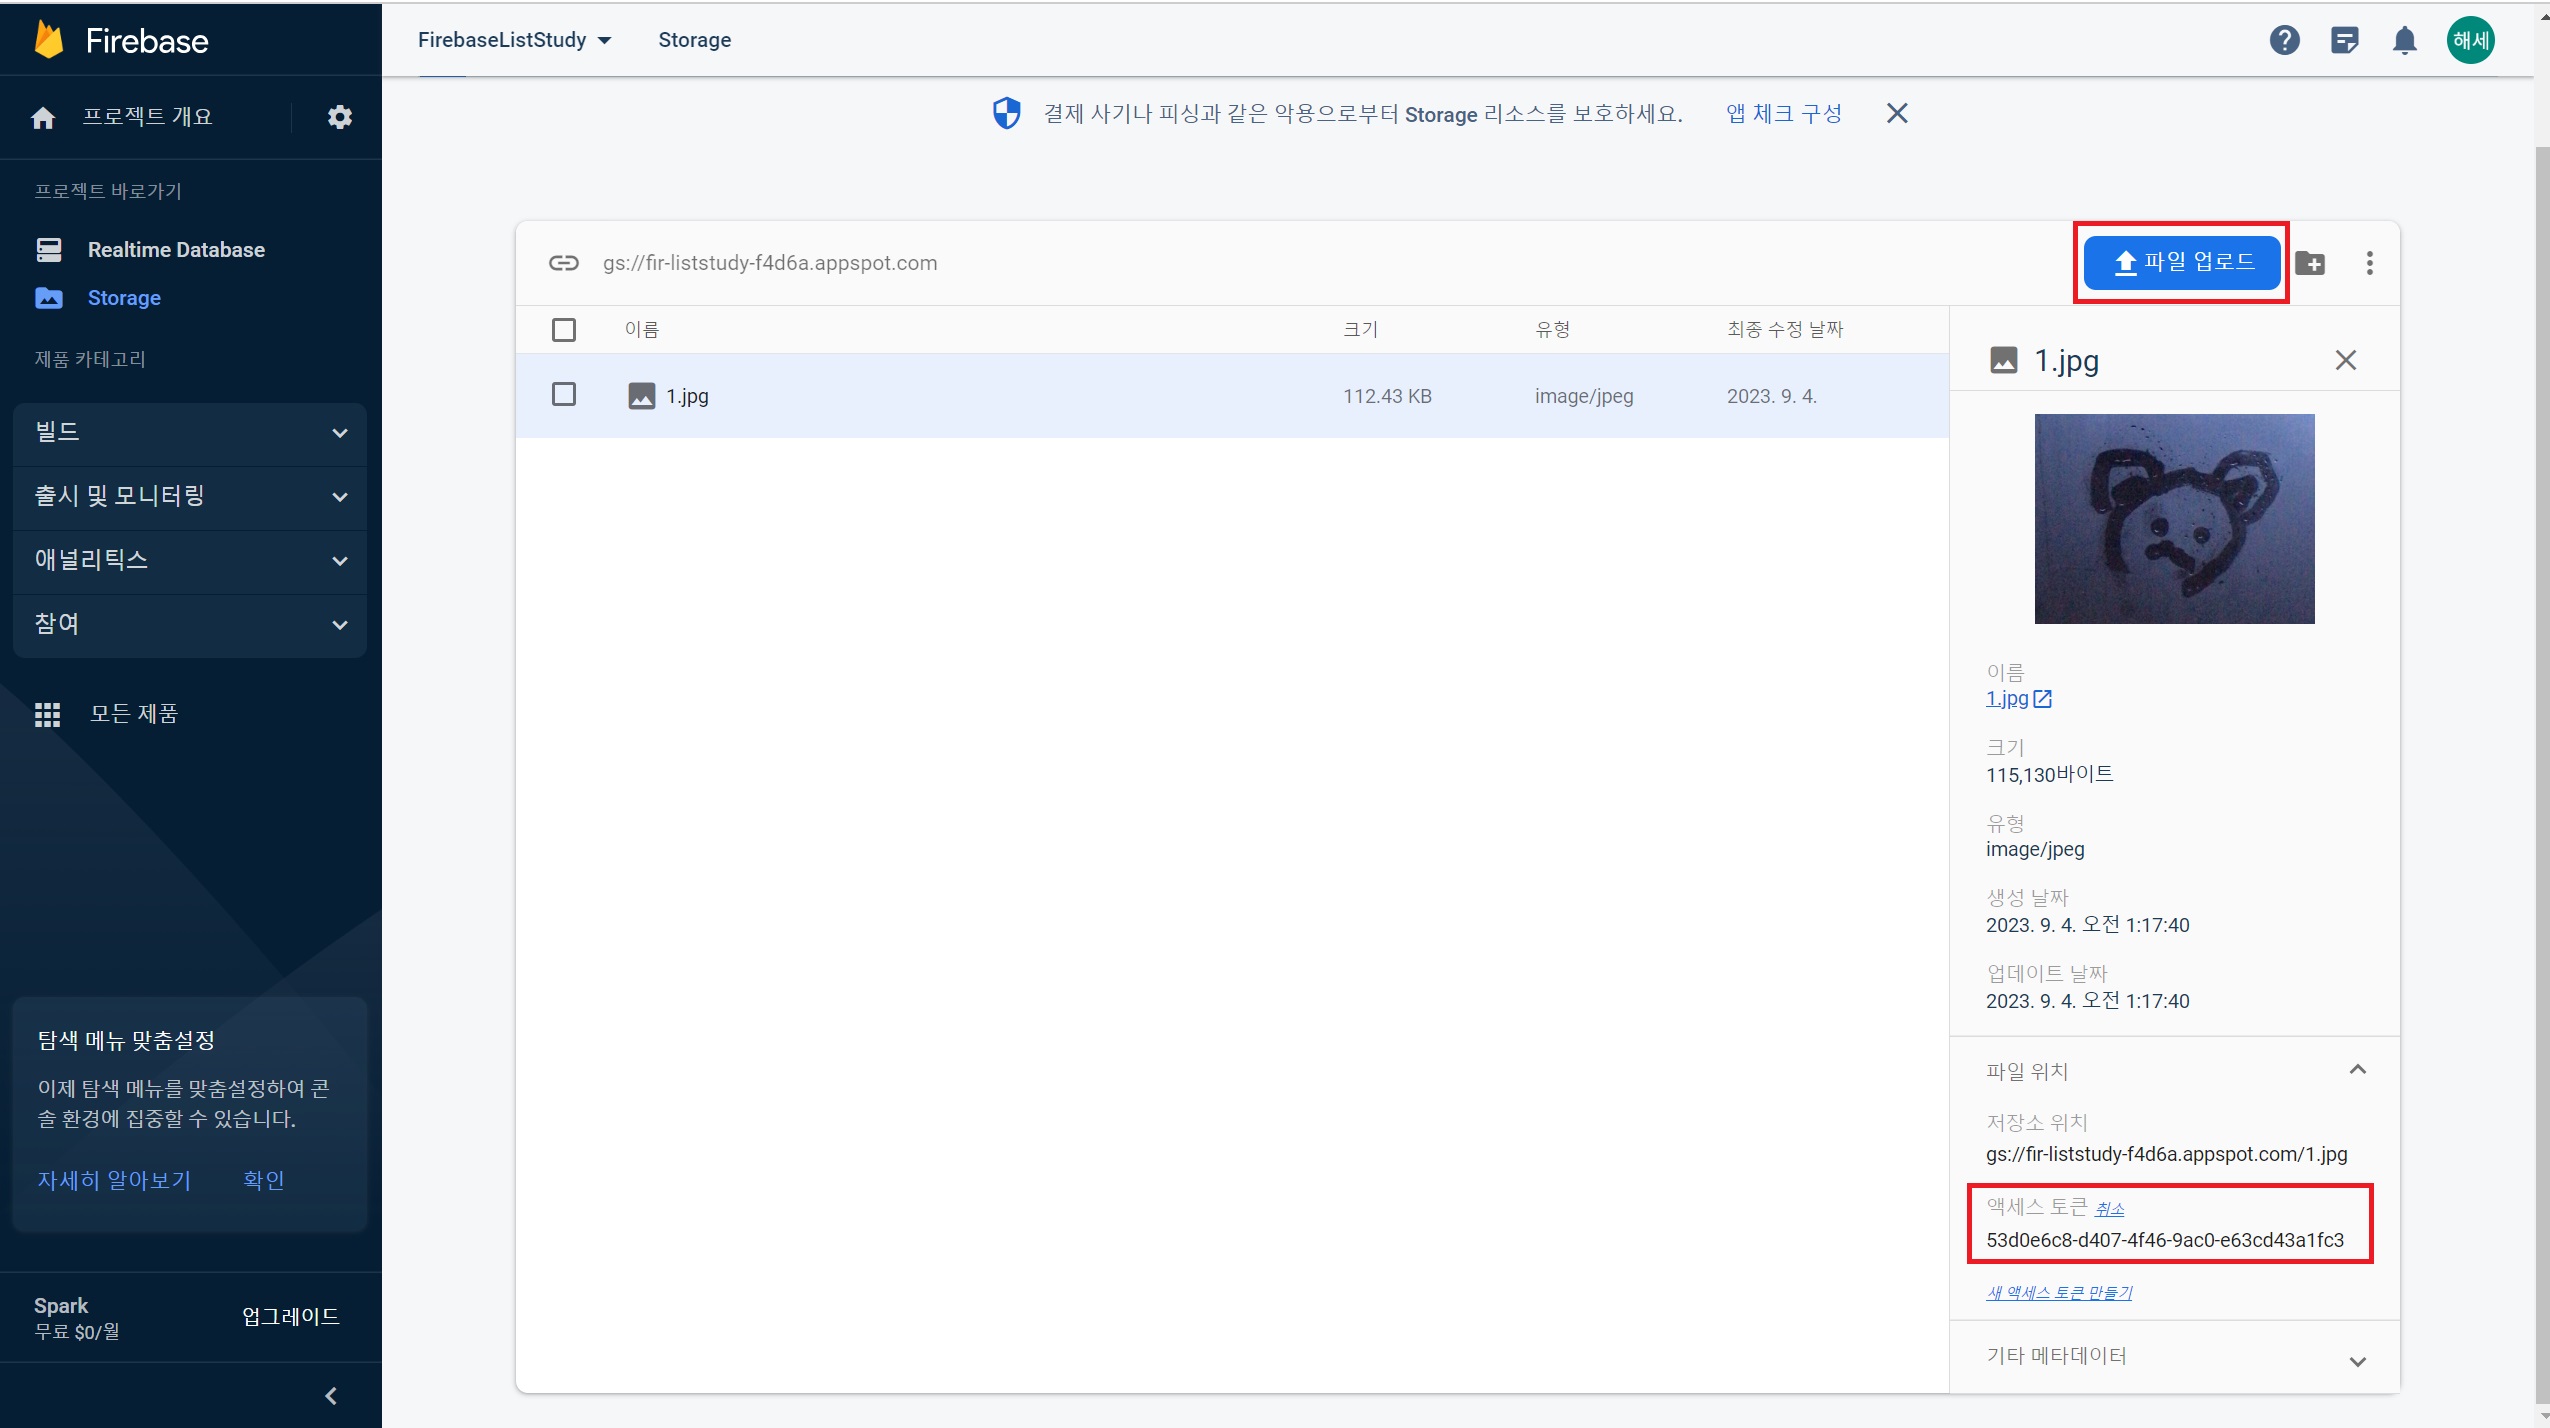
액세스 토큰 클릭 (자동 복사가 된다)
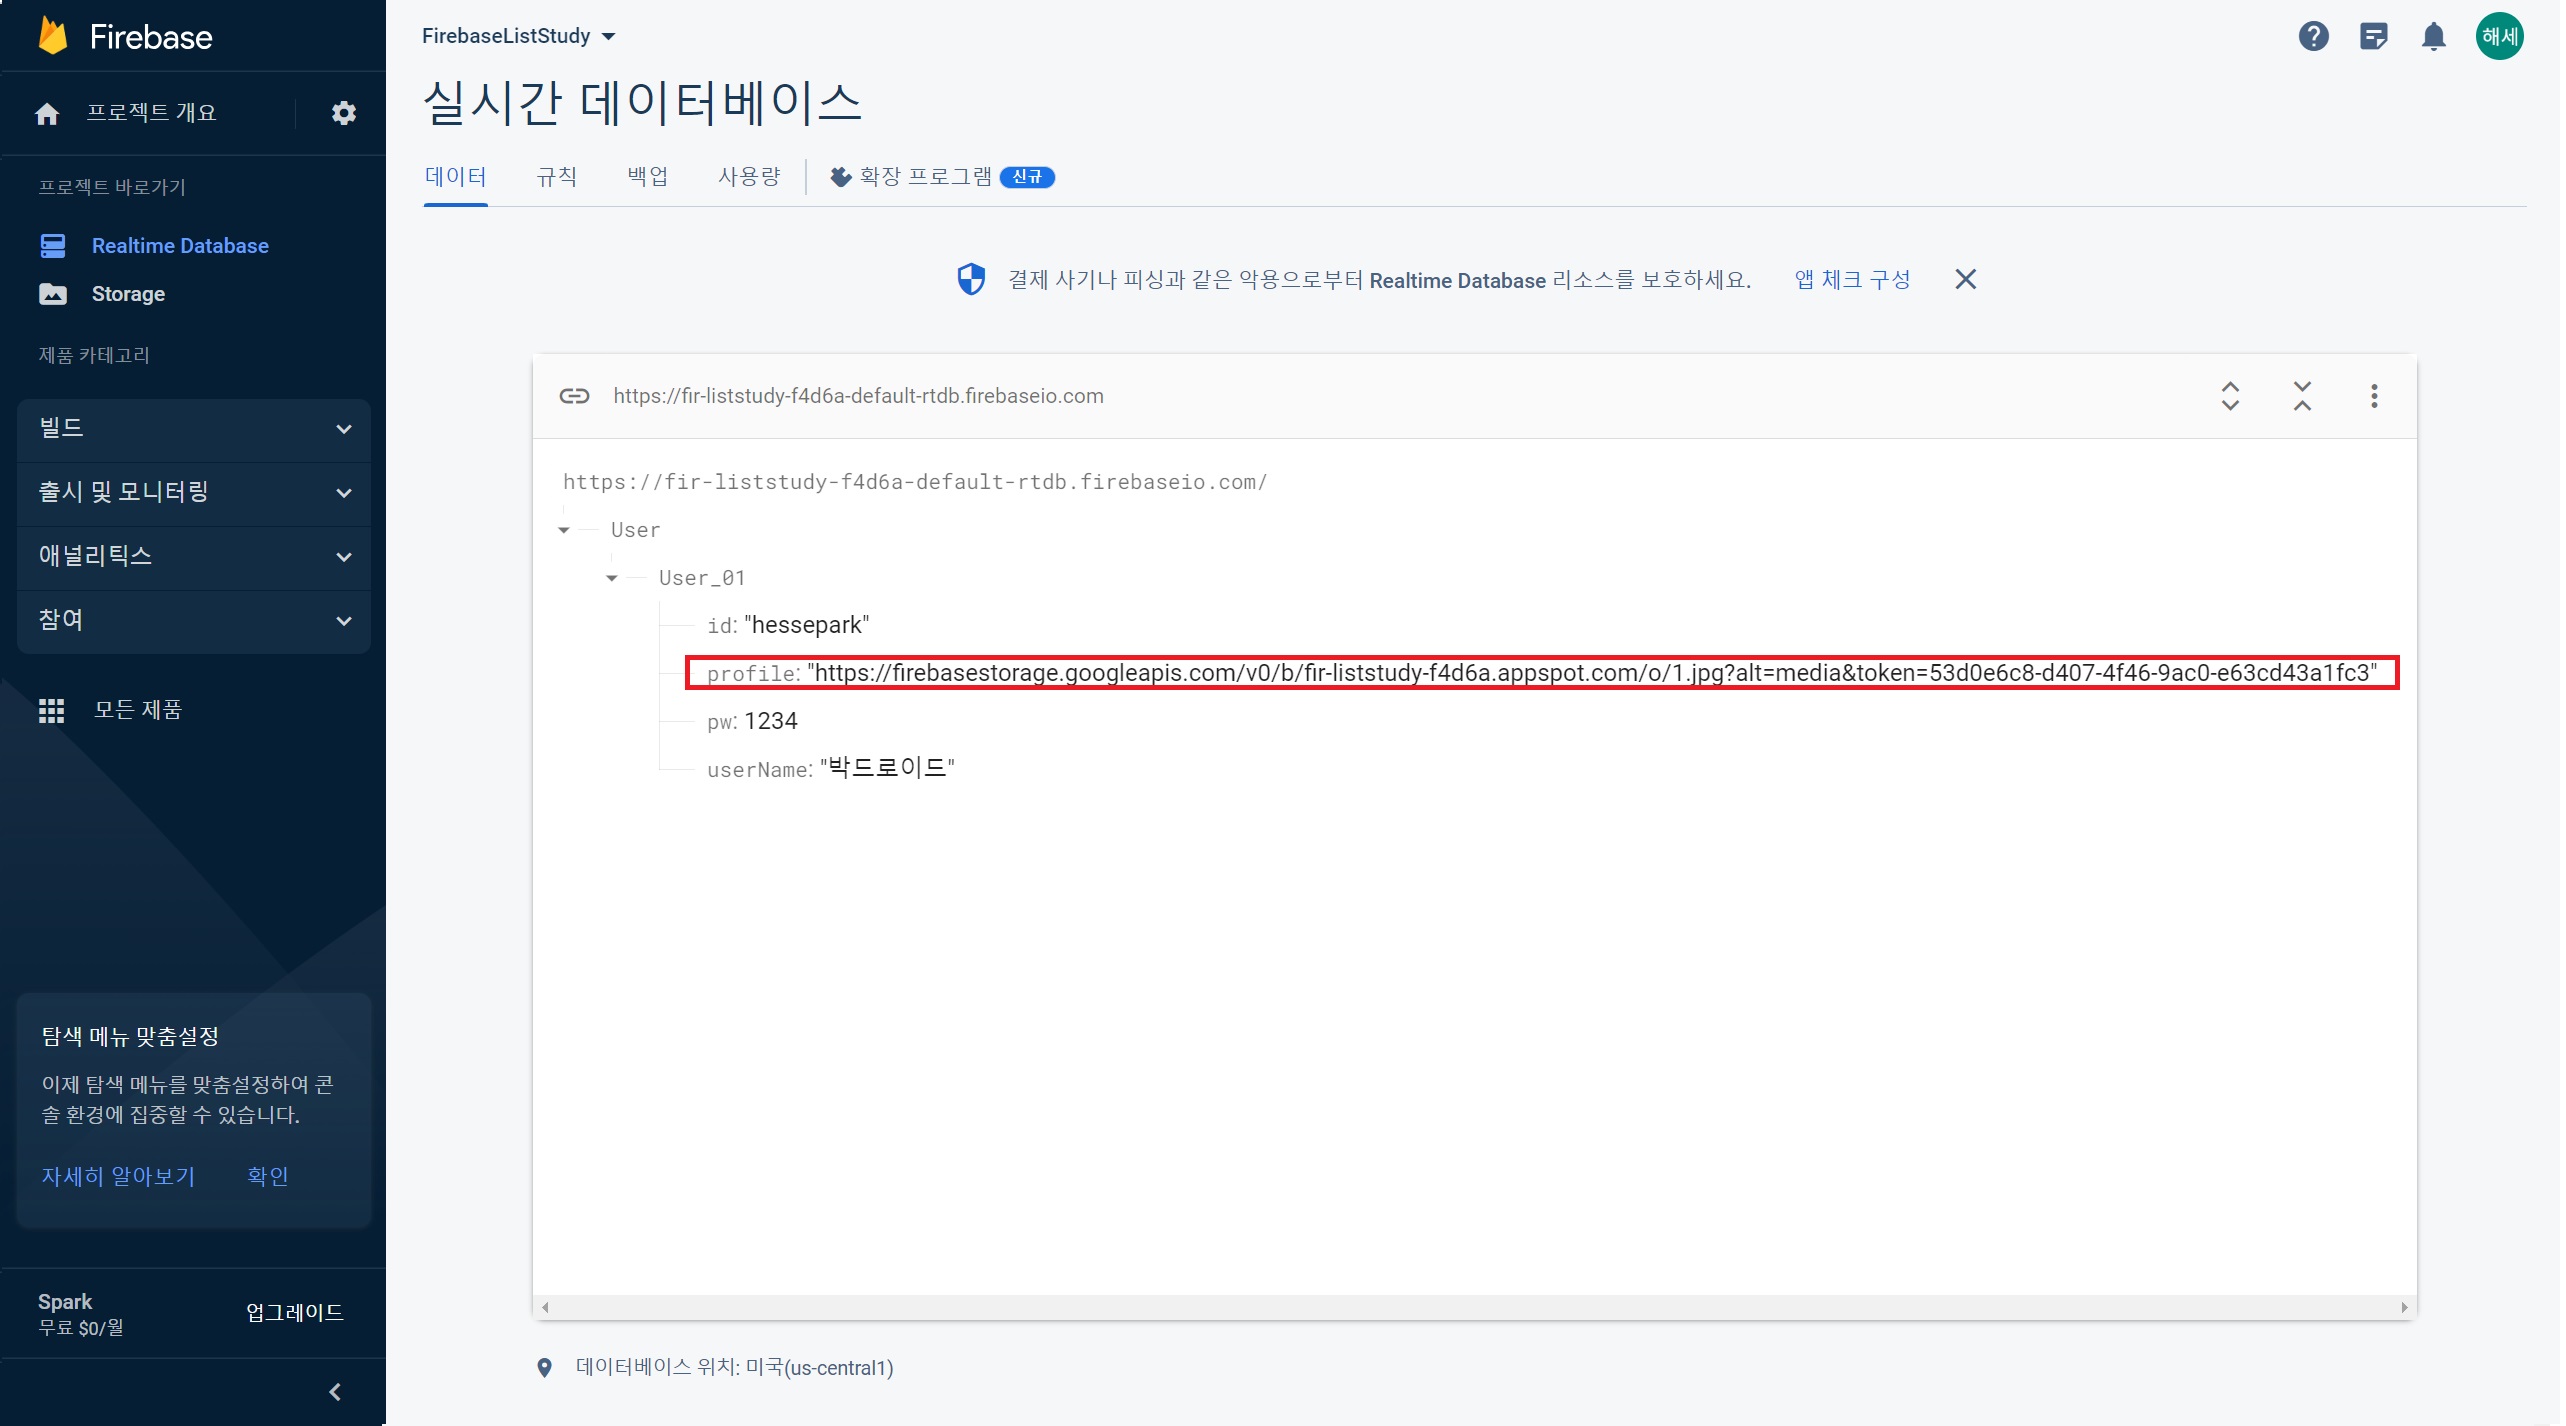
Realtime Database로 돌아온 후 profile 만들어서 붙여넣기

User 여러 명을 만들고 싶은데 일일이 치기엔 귀찮으면
JSON 내보내기 선택

,을 하나 넣은 후 빨간색 전체 내용 복사 붙여넣기 해서 여러 개 만들기
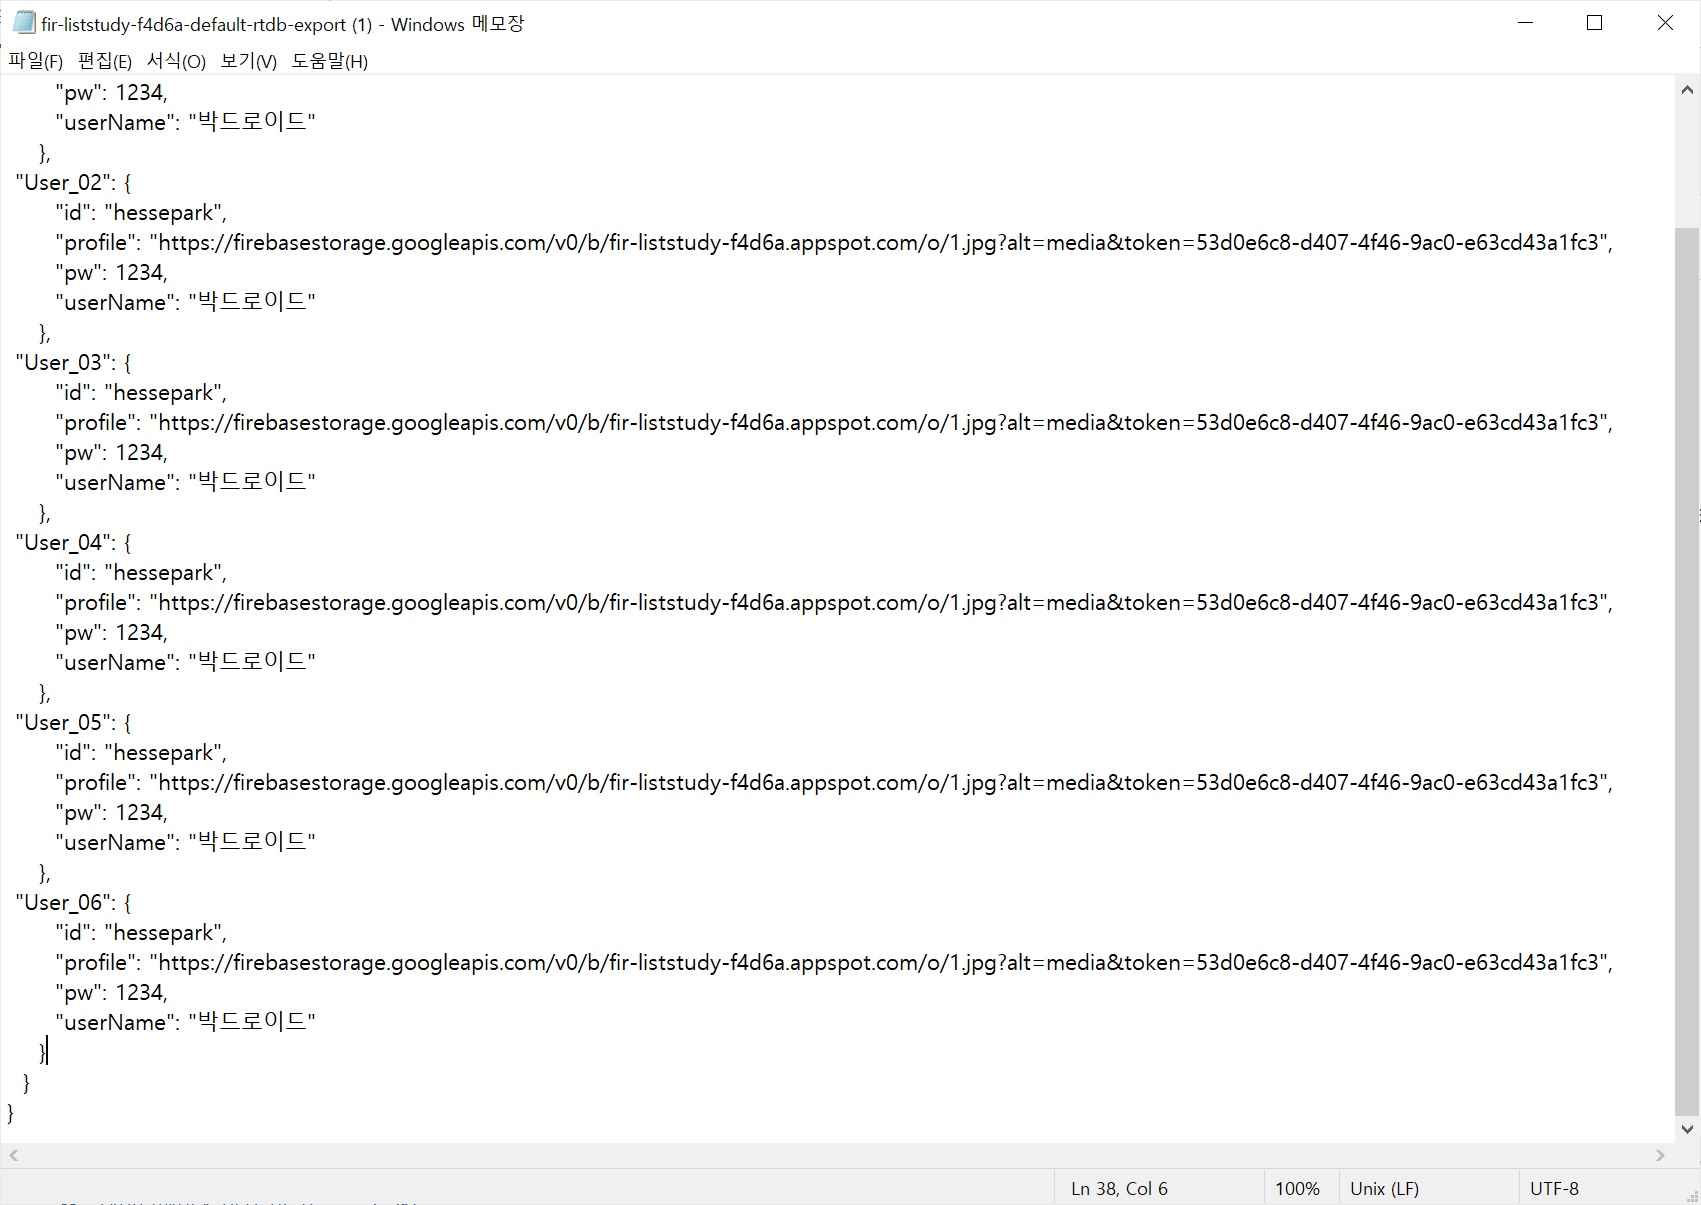
맨 마지막 ,는 삭제. 가공 후 저장
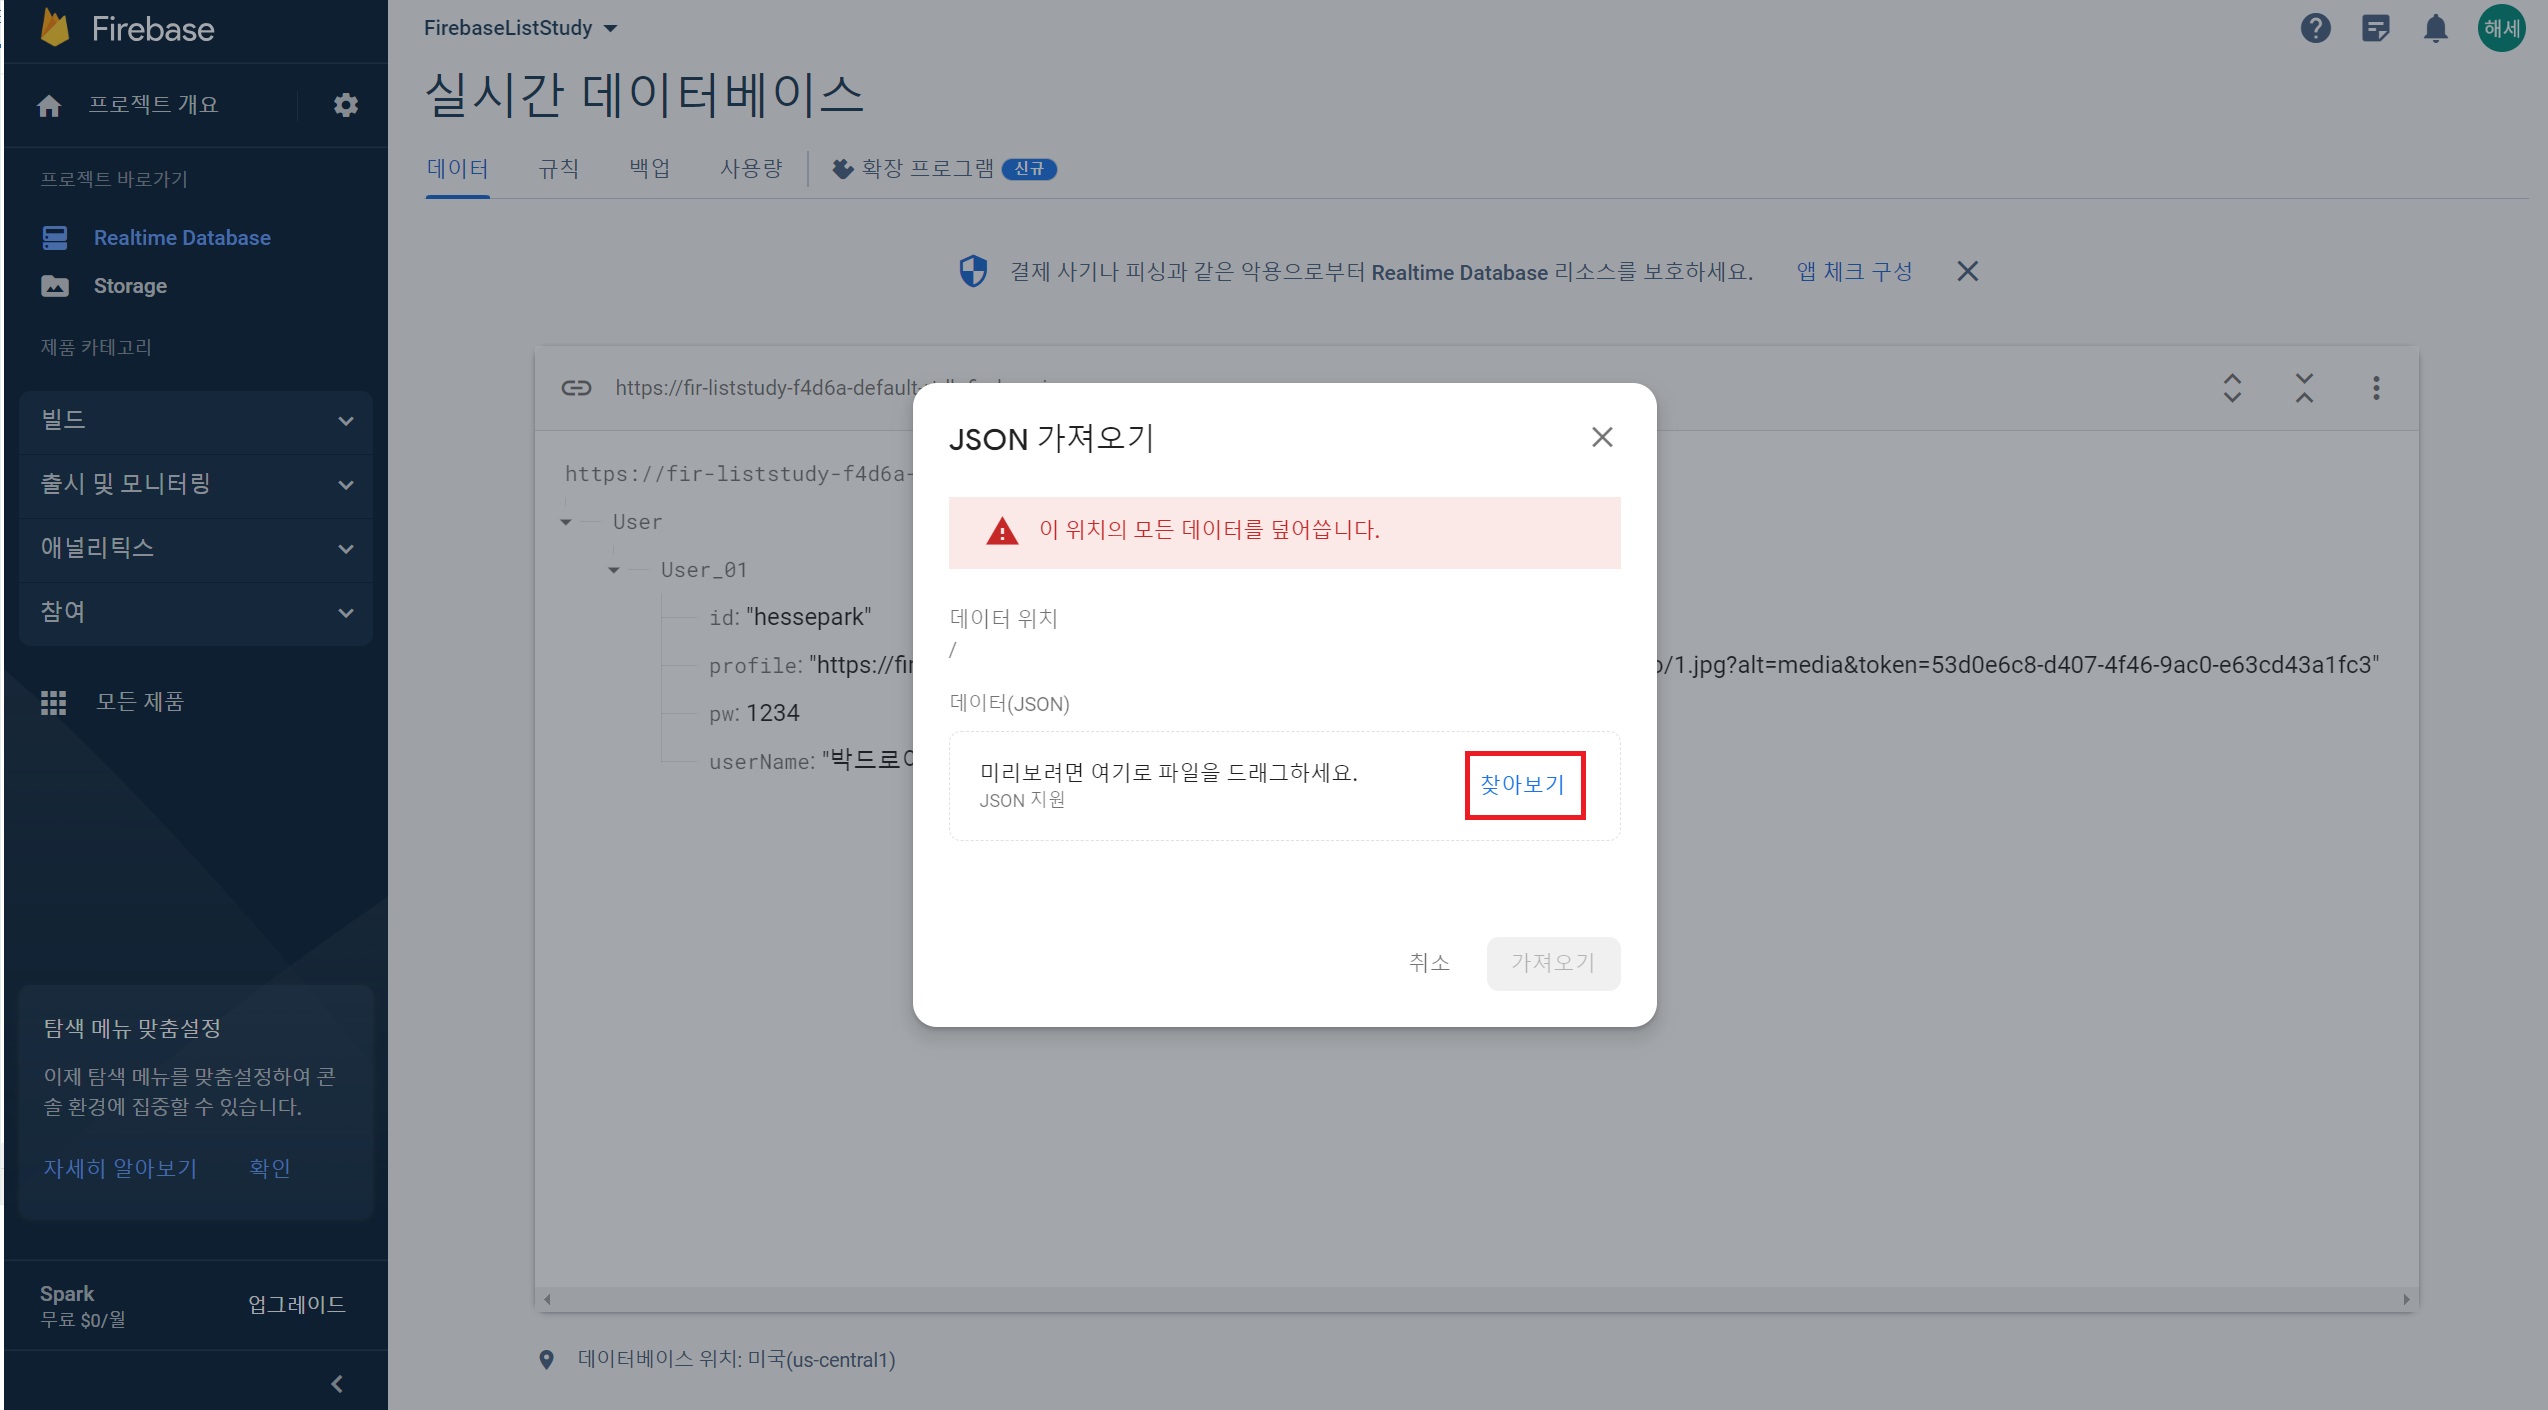
JSON 가져오기
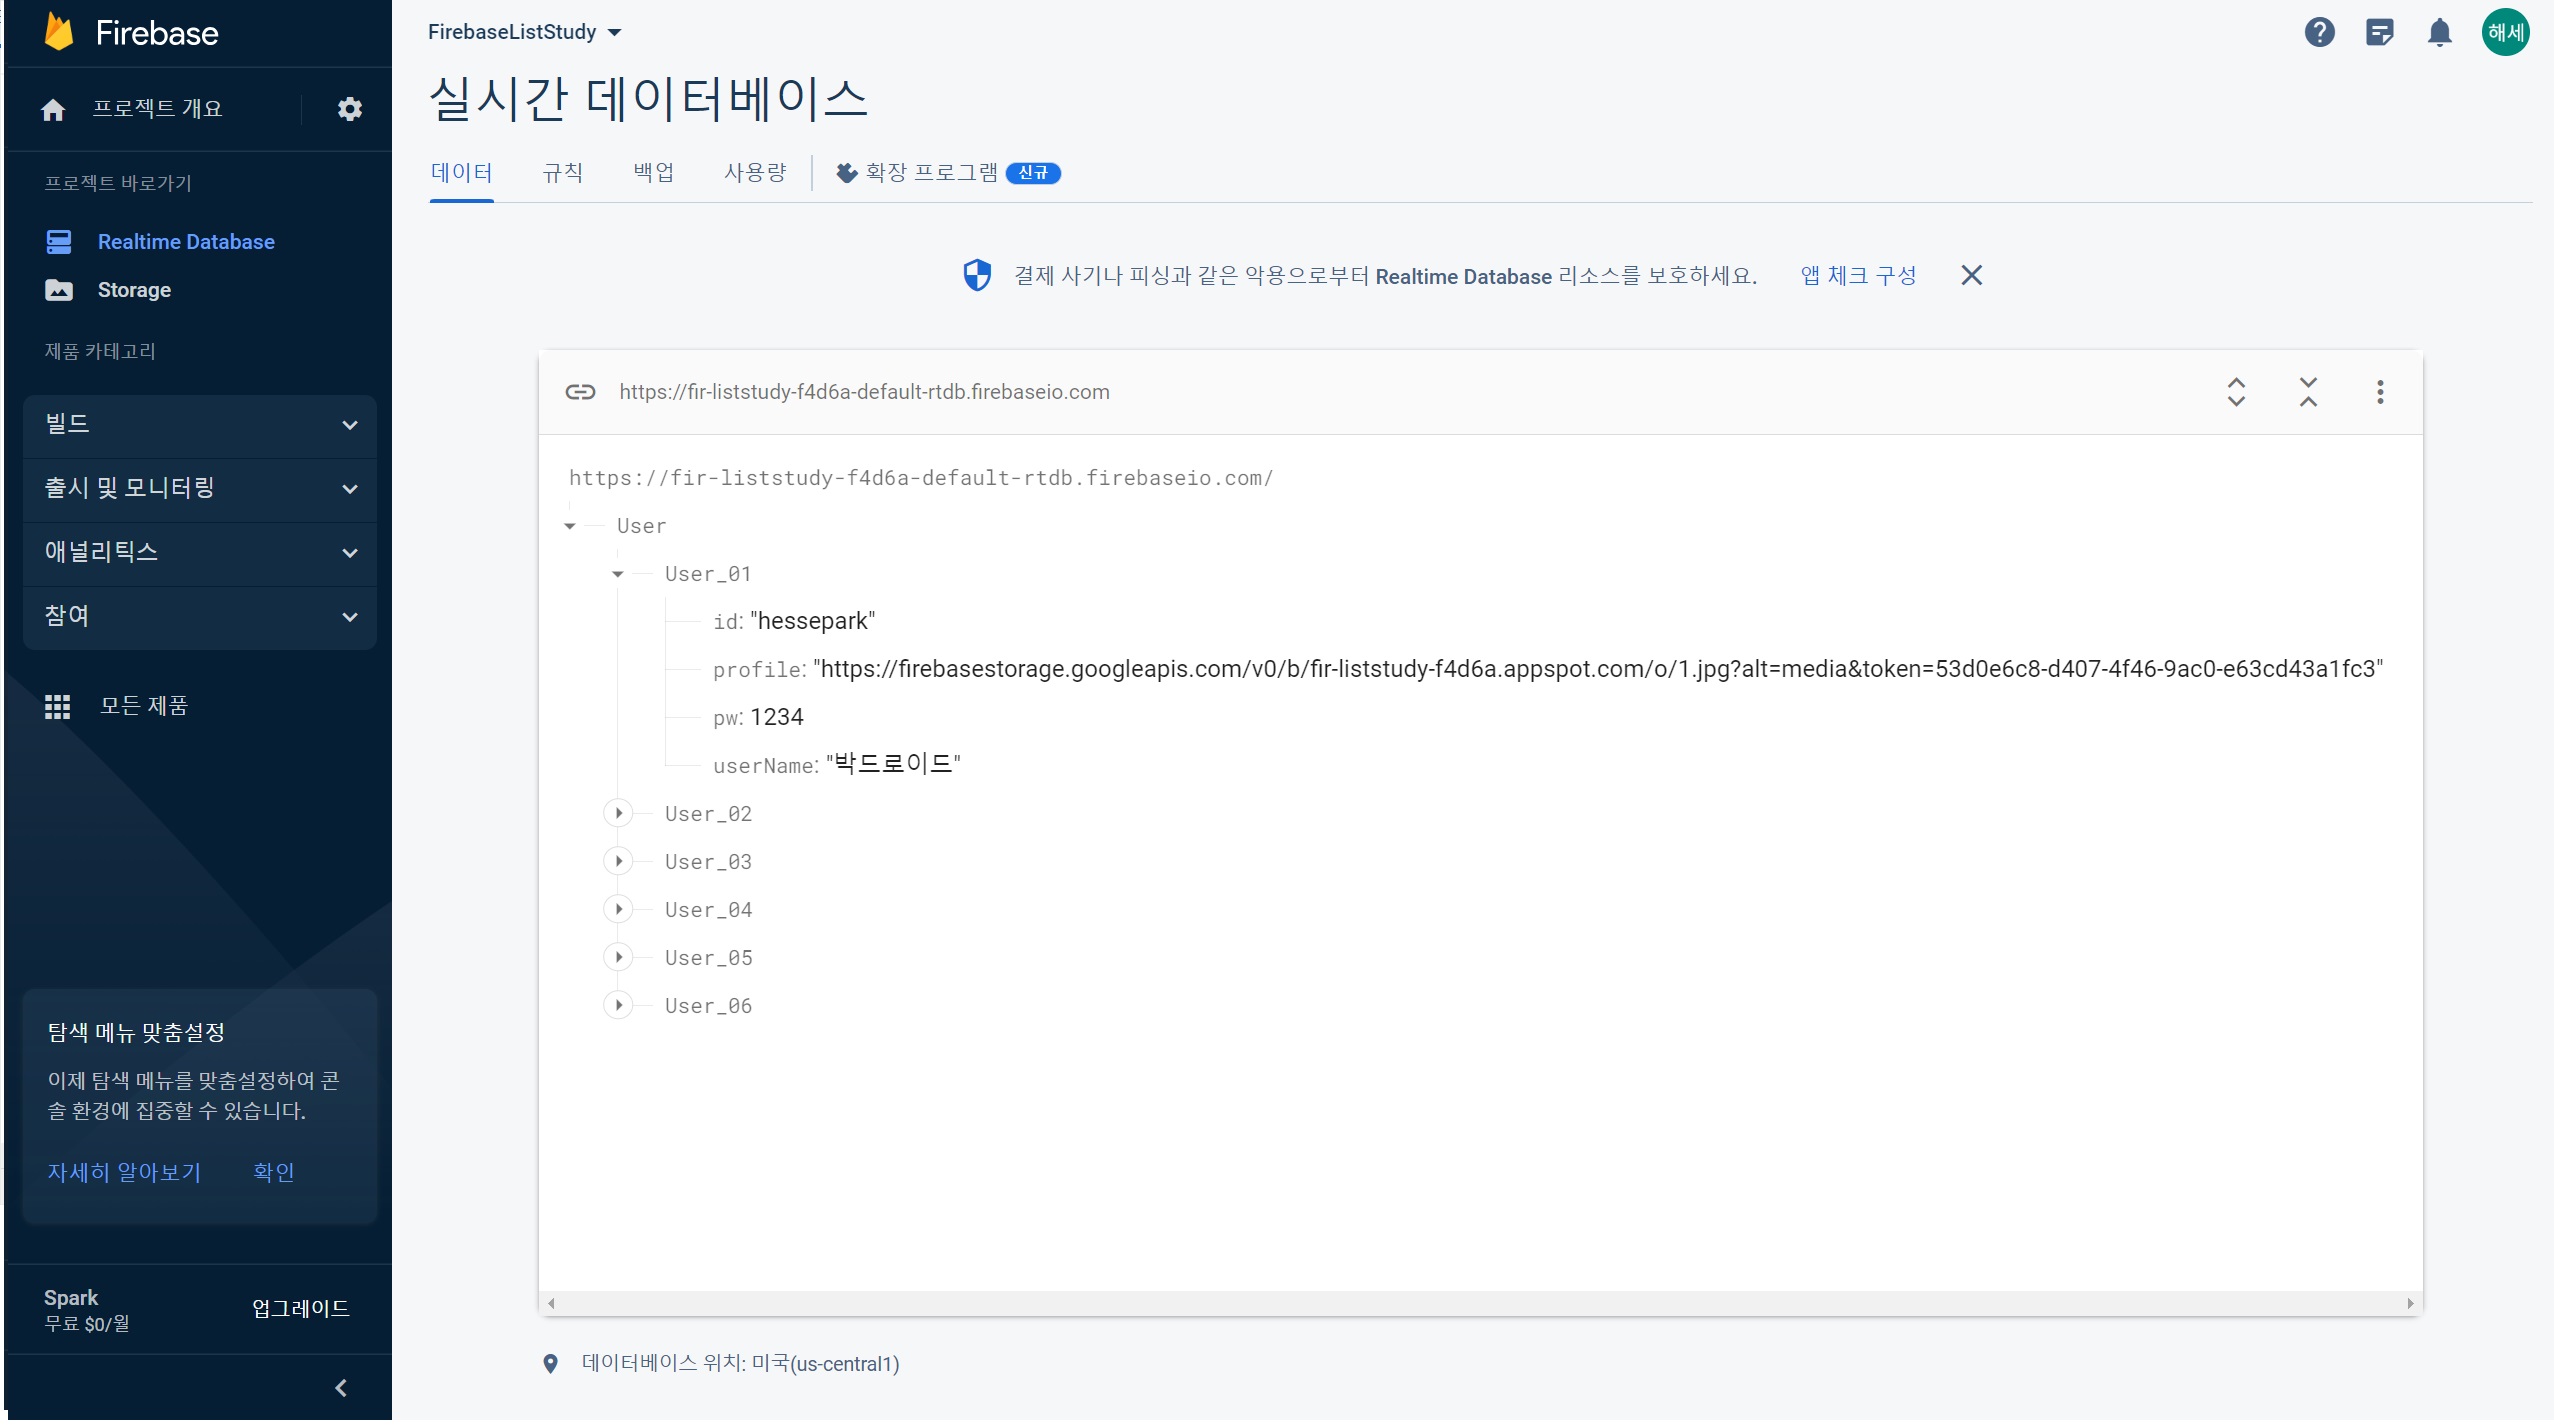
불러오면 이렇게 된다.
코드
activity_main.xml
<?xml version="1.0" encoding="utf-8"?>
<androidx.constraintlayout.widget.ConstraintLayout xmlns:android="http://schemas.android.com/apk/res/android"
    xmlns:app="http://schemas.android.com/apk/res-auto"
    xmlns:tools="http://schemas.android.com/tools"
    android:layout_width="match_parent"
    android:layout_height="match_parent"
    tools:context=".MainActivity">

    <androidx.recyclerview.widget.RecyclerView
        android:id="@+id/recyclerView"
        android:layout_width="match_parent"
        android:layout_height="match_parent"/>

</androidx.constraintlayout.widget.ConstraintLayout>
list_item.xml
<?xml version="1.0" encoding="utf-8"?>
<LinearLayout xmlns:android="http://schemas.android.com/apk/res/android"
    android:layout_width="match_parent"
    android:layout_height="wrap_content">

    <LinearLayout
        android:layout_width="match_parent"
        android:layout_height="wrap_content"
        android:orientation="horizontal">
">

        <ImageView
            android:id="@+id/iv_profile"
            android:layout_width="80dp"
            android:layout_height="80dp"
            android:layout_margin="5dp"
            android:src="@drawable/ic_launcher_foreground"/>

            <LinearLayout
                android:layout_width="match_parent"
                android:layout_height="wrap_content"
                android:layout_marginLeft="15dp"
                android:orientation="vertical">

                <TextView
                    android:id="@+id/tv_id"
                    android:layout_width="wrap_content"
                    android:layout_height="wrap_content"
                    android:text="아이디"
                    android:layout_margin="5dp"/>

                <TextView
                    android:id="@+id/tv_pw"
                    android:layout_width="wrap_content"
                    android:layout_height="wrap_content"
                    android:text="비밀번호"
                    android:layout_margin="5dp"/>

                <TextView
                    android:id="@+id/tv_userName"
                    android:layout_width="wrap_content"
                    android:layout_height="wrap_content"
                    android:text="hessepark"
                    android:layout_margin="5dp"/>


            </LinearLayout>


    </LinearLayout>

</LinearLayout>
User.java
package com.example.firebaseliststudy;

public class User {
    private String profile;
    private String id;
    private int pw;
    private String userName;

    public User(){}

    public String getProfile() {
        return profile;
    }

    public void setProfile(String profile) {
        this.profile = profile;
    }

    public String getId() {
        return id;
    }

    public void setId(String id) {
        this.id = id;
    }

    public int getPw() {
        return pw;
    }

    public void setPw(int pw) {
        this.pw = pw;
    }

    public String getUserName() {
        return userName;
    }

    public void setUserName(String userName) {
        this.userName = userName;
    }
}
CustomAdapter.java
package com.example.firebaseliststudy;

import android.content.Context;
import android.view.LayoutInflater;
import android.view.View;
import android.view.ViewGroup;
import android.widget.ImageView;
import android.widget.TextView;

import androidx.annotation.NonNull;
import androidx.recyclerview.widget.RecyclerView;

import com.bumptech.glide.Glide;

import java.util.ArrayList;

public class CustomAdapter extends RecyclerView.Adapter<CustomAdapter.CustomViewHolder> {

    private ArrayList<User> arrayList;
    private Context context; // Adapter에서 context가 없어서 선택한 activity에 대한 context 가져올 때 필요

    public CustomAdapter(ArrayList<User> arrayList, Context context) {
        this.arrayList = arrayList;
        this.context = context;
    }

    @NonNull
    @Override
    public CustomViewHolder onCreateViewHolder(@NonNull ViewGroup parent, int viewType) { // 리스트뷰 만들고 최초로 연결
        View view = LayoutInflater.from(parent.getContext()).inflate(R.layout.list_item, parent, false); // 한 Column 만들 때 대한 list_item 선언
        CustomViewHolder holder = new CustomViewHolder(view);
        return holder;
    }

    @Override
    public void onBindViewHolder(@NonNull CustomViewHolder holder, int position) {
        Glide.with(holder.itemView)
                .load(arrayList.get(position).getProfile()) //로직 설명 20:00 (데이터 가져와서 User에서 어댑터로 쏘고 어댑터에서 받아옴)
                .into(holder.iv_profile);
        holder.tv_id.setText(arrayList.get(position).getId());
        holder.tv_pw.setText(String.valueOf(arrayList.get(position).getPw()));
        holder.tv_userName.setText(arrayList.get(position).getUserName());
    }

    @Override
    public int getItemCount() {
        // 삼항 연산자
        return (arrayList != null ? arrayList.size() : 0);
    }

    public class CustomViewHolder extends RecyclerView.ViewHolder {
        ImageView iv_profile;
        TextView tv_id;
        TextView tv_pw;
        TextView tv_userName;

        public CustomViewHolder(@NonNull View itemView) {
            super(itemView);
            this.iv_profile = itemView.findViewById(R.id.iv_profile); //itemView가 상위임
            this.tv_id = itemView.findViewById(R.id.tv_id);
            this.tv_pw = itemView.findViewById(R.id.tv_pw);
            this.tv_userName = itemView.findViewById(R.id.tv_userName);
        }
    }
}
MainActivity.java
package com.example.firebaseliststudy;

import androidx.annotation.NonNull;
import androidx.appcompat.app.AppCompatActivity;
import androidx.recyclerview.widget.LinearLayoutManager;
import androidx.recyclerview.widget.RecyclerView;

import android.os.Bundle;
import android.util.Log;

import com.google.firebase.database.DataSnapshot;
import com.google.firebase.database.DatabaseError;
import com.google.firebase.database.DatabaseReference;
import com.google.firebase.database.FirebaseDatabase;
import com.google.firebase.database.ValueEventListener;

import java.util.ArrayList;

public class MainActivity extends AppCompatActivity {

    private RecyclerView recyclerView;
    private RecyclerView.Adapter adapter;
    private RecyclerView.LayoutManager layoutManager;
    private ArrayList<User> arrayList; //arrayList 매개로 왔다갔다
    private FirebaseDatabase database;
    private DatabaseReference databaseReference;

    @Override
    protected void onCreate(Bundle savedInstanceState) {
        super.onCreate(savedInstanceState);
        setContentView(R.layout.activity_main);

        recyclerView=findViewById(R.id.recyclerView); // 아이디 연결
        recyclerView.setHasFixedSize(true); // 리사이클러 뷰 기존 성능 강화
        layoutManager = new LinearLayoutManager(this);
        recyclerView.setLayoutManager(layoutManager);
        arrayList = new ArrayList<>(); // User 객체를 담을 어레이 리스트 (어댑터 쪽으로)

        database = FirebaseDatabase.getInstance(); // 파이어베이스 데이터베이스 연동

        databaseReference = database.getReference("User"); // DB 테이블 연결
        databaseReference.addListenerForSingleValueEvent(new ValueEventListener() {
            @Override
            public void onDataChange(@NonNull DataSnapshot dataSnapshot) {
                // 파이어베이스 데이터베이스의 데이터를 받아오는 곳
                arrayList.clear(); // 기존 배열리스트가 존재하지 않게 초기화
                for (DataSnapshot snapshot : dataSnapshot.getChildren()){  // 반복문으로 데이터 List를 추출해냄
                    User user = snapshot.getValue(User.class); //User.class에 파이어베이스 내용 넣고 arrayList에 담아서 어댑터로 쏨
                    // 만들어뒀던 User 객체에 데이터를 담는다.
                    arrayList.add(user); // 담은 데이터들을 배열리스트에 넣고 리사이클러뷰로 보낼 준비
                }
                adapter.notifyDataSetChanged(); // 리스트 저장 및 새로고침
            }

            @Override
            public void onCancelled(@NonNull DatabaseError error) {
                // 디비를 가져오던 중 에러 발생 시
                Log.e("MainActivity",String.valueOf(error.toException())); //에러문 출력
            }
        });

        adapter = new CustomAdapter(arrayList,this);
        recyclerView.setAdapter(adapter); // 리사이클러뷰에 어댑터 연결


    }
}Alt+Insert 하고
Ctrl+A (전체 선택) 활용하면 Getter&Setter 설정 손쉽게 가능
결과

+ 어댑터에 대한 추가 지식이 필요할 것 같다.
728x90
'[Android Studio] (Java)' 카테고리의 다른 글
| [Android Studio] 깃허브 연동, commit/push 정리 (0) | 2023.09.04 |
|---|---|
| [Android Studio] Room Database (앱 내부 데이터베이스) (0) | 2023.09.03 |
| [Android Studio] RegisterForActivityResult (0) | 2023.09.03 |
| [Android studio] 생명 주기 (Life Cycle) (0) | 2023.09.03 |
| [Android Studio] View Binding (뷰 바인딩) (0) | 2023.09.03 |